Content Creator
The Appearition Platform enables you to create XR experiences for the content you create and share them with people to view on their own devices. By default, the Appearition Platform allows your to create AR (i.e. Augmented Reality) experiences.
Advanced XR features
For more advanced XR such as MR and VR, please contact our team for assistance.
1. Register an Appearition Platform account#
The first step you need is to setup an account on the Appearition Platform. Setup takes minutes:
You will need to verify your email address to complete registration
You will receive two emails from Appearition Support - one for verification and the other notifying your account is ready. Please click the link in the verification email to enable successful login into the portal.
Where is my verification email?
After registration please look for an email from “support@appearition.com” with a link to verify your email address. If you do not receive this email in your inbox, please check other folders such “promotions” or “junk” or “spam”. If you are unsure please contact us at support@appearition.com
2. Configure your account for sharing AR experiences#
To enable users to view AR experiences you must register an “application” on the Appearition Platform. The “application” is unique to your account and is required so that the Appearition Platform can control access to your experiences and capture stats and metrics about usage.
Follow these steps to register an application on your account:
-
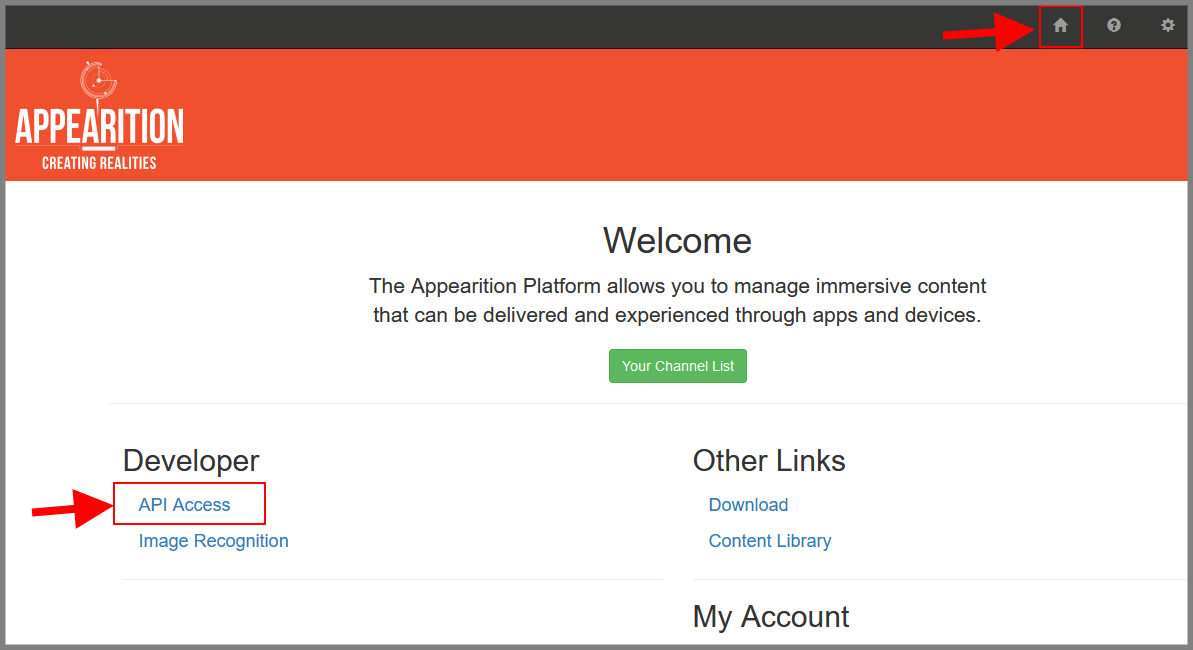
From your Home page navigate to the API Access screen.
-
On the API Access screen click on the blue + Register Application button
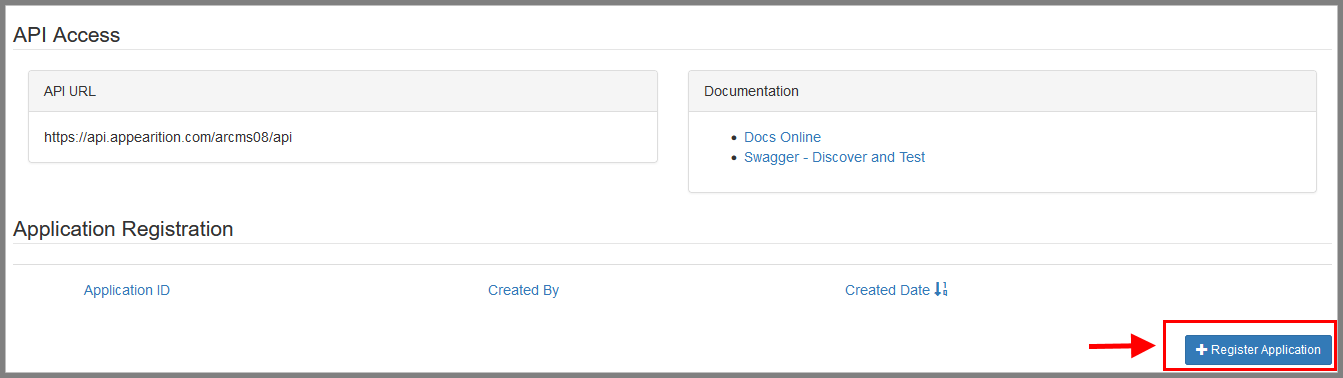
-
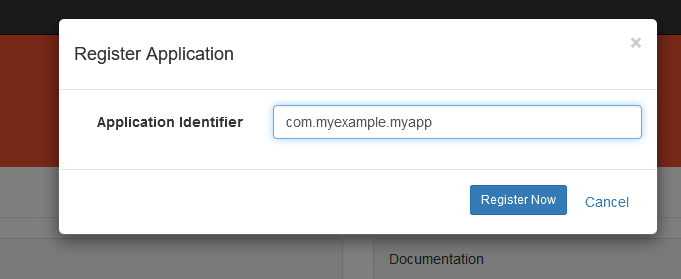
On the Register Application dialog enter in an application identifier. This can be any text but it must be a unique name that has not already been registered on the Appearition Platform (eg. john.smith.ar). If by chance you supply a name that already exists, the screen will let you know and you will be able to enter a different name.
-
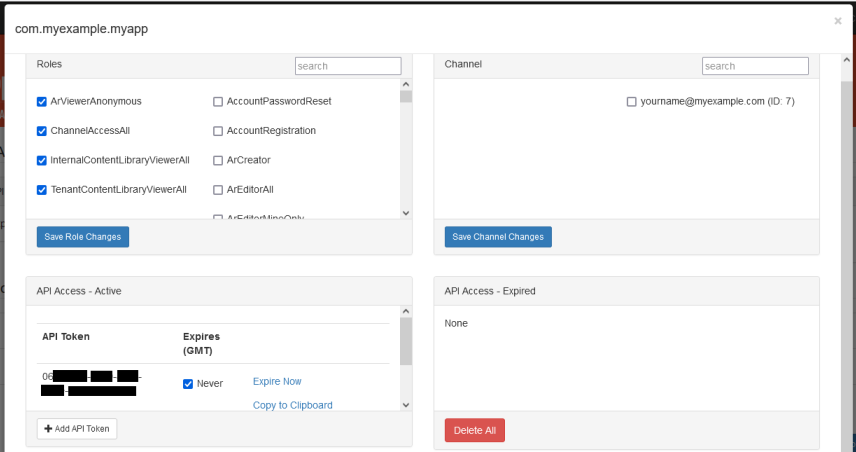
The next step is to configure your registered application with protection controls. Select the Edit link next your registered application to show a pop up panel with 4 sections. Follow these steps in each section:
- Roles - tick all of these options:
- ArViewerAnonymous
- ChannelAccessAll
- InternalContentLibraryViewerAll
- TenantContentLibraryViewerAll
- API Access - Active
- click on ** + Add API Token** button. It will create a unique key which the Appearition Platform will use when sharing an experience with users.
- click on ** + Add API Token** button. It will create a unique key which the Appearition Platform will use when sharing an experience with users.
- Roles - tick all of these options:
3. Get your content ready for AR#
When creating an AR experience you will need to decide how the experience should be triggered by your audience. There are two options:
- Scanning a picture (known as a marker based experience using a “target image”); or
- Scanning a flat surface like a table or floor (known as a markerless experience)
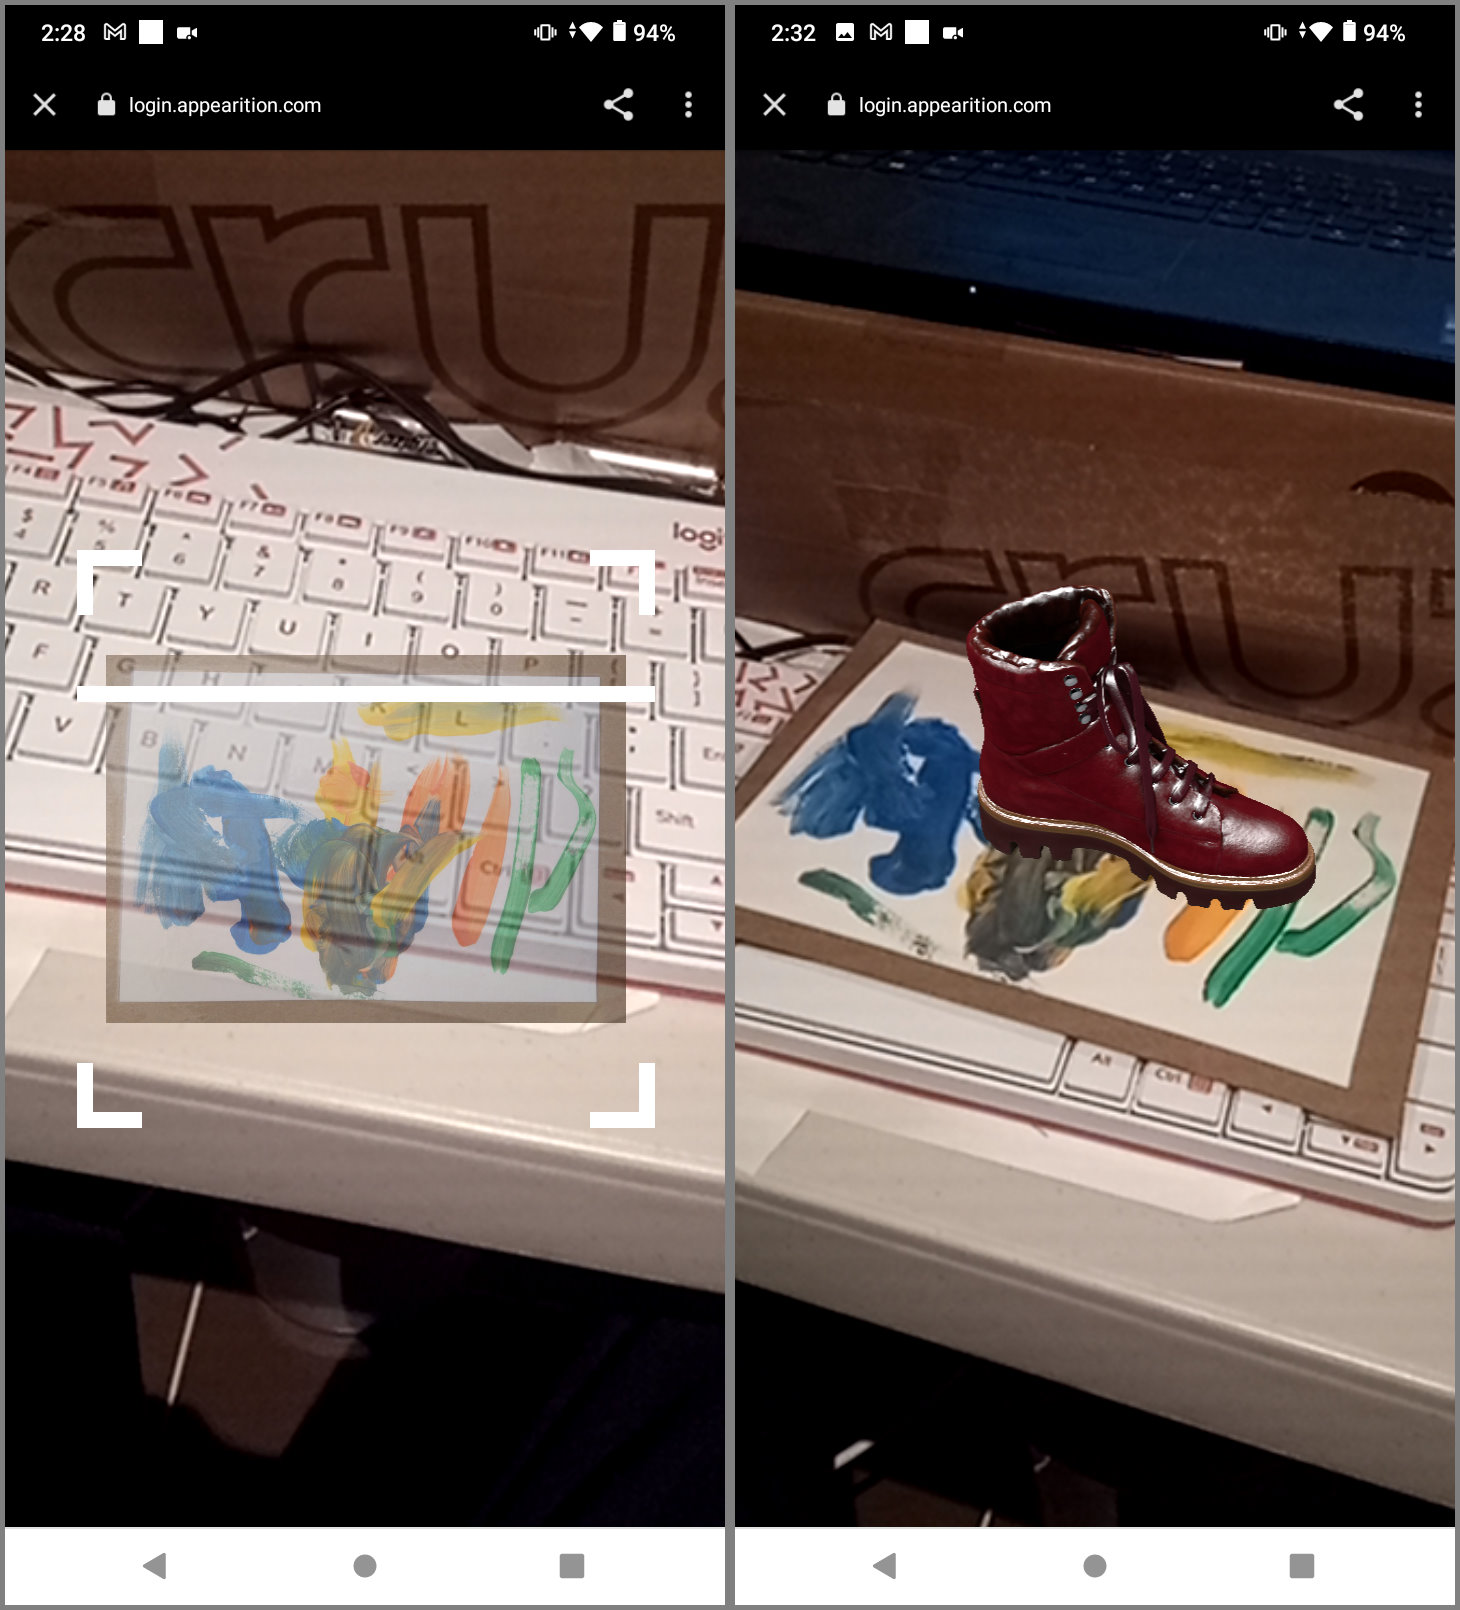
In both cases your audience will be using a phone or tablet and performing the “scanning” through the camera view inside a web browser or a special app on their device.
Depending on the above two options, different kinds of content can be shown when the experience is triggered.
Image and Video#
Images and videos can be added to an experience to show or play to the viewer when they scan a picture (i.e. a marker based experience). Using the editing tools in the portal, you will be able to position and size your image or video so that it augments exactly where you want on top of the picture being scanned.
Common supported image formats include JPG and PNG, while supported video formats depend on what your viewer’s device can play natively. In most cases MP4 formats will work.
Note
By default, image and video content cannot be used in markerless experiences. Please contact us for assistance on how you can unlock this capability
3D model#
3D models can be added to an experience for both “marker based” and “markerless” experiences. However depending on how the experience is triggered, different 3D formats are supported:
- FBX - Flexbox files with embedded textures. Marker based only
- OBJ - Wavefront object files with additional material (MTL) and texture files. The files should be packaged as a ZIP archive without subfolders or as a content library item on your Appearition Platform Channel. Marker based experiences only
- GLB/GLTF - Graphics Library Transmission Format Binary. Currently supported by Android devices for WebAR+ for both Marker based and Markerless experiences
- USDZ - Universal Scene Description Zipped files. Currently supported by iOS devices for WebAR+ Markless experiences only
+ WebAR is augmented reality using a mobile device’s web browser to serve an experience. A native AR app in conjuction with a cloud-based computer vision provider can also be used to serve an experience but requires separate development. Contact us for assistance
To optimize model rendering for mobile devices we recommend the following operations before you create an experience on the Appearition Platform:
- Simplify the model to a single mesh and reduce the total amount of polygons to less than 200,000
- Reduce the number of texture files and keep the dimensions to less than 2048 x 2048 pixels for each texture file
- Position the model at the origin (0,0,0) and scale within 0.5 metre for all dimensions
4. Upload your content onto the Appearition Platform#
The Appearition Platform has a Content Library feature that will store and serve your content as part of AR experiences. To upload your content follow these steps:
- From the Home Page, click on the green Your Channel List

- Under the Channel List page, click on the channel tile named after your email address
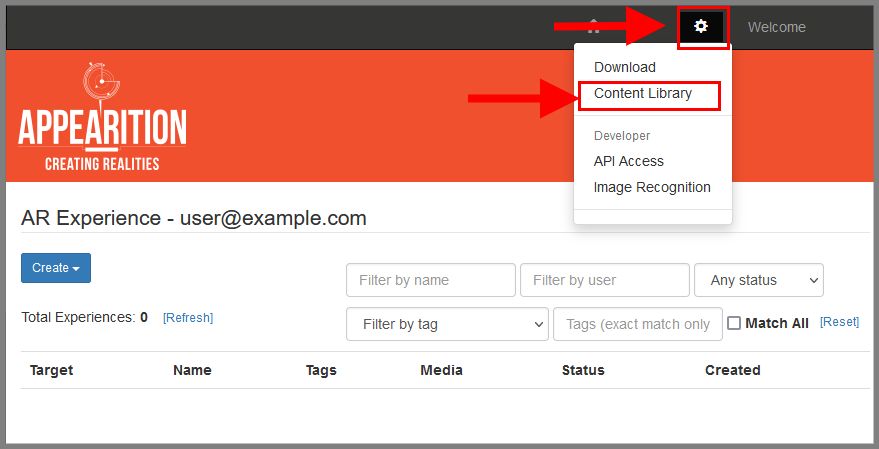
- On the channel’s AR Experience page, click on the cog wheel in the top right of the Platform portal, then click the dropdown link for Content Library
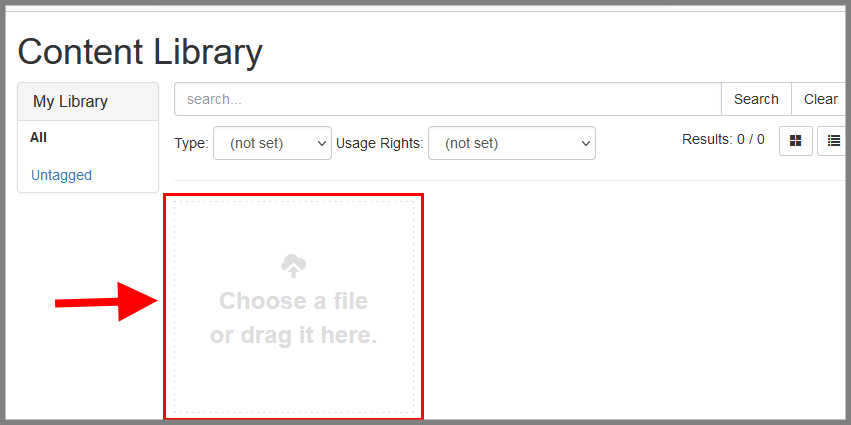
- In the Content Library Page, click on the Choose a file or drag it here tile to add a new library item. From the File Dialog box select your content and choose Open
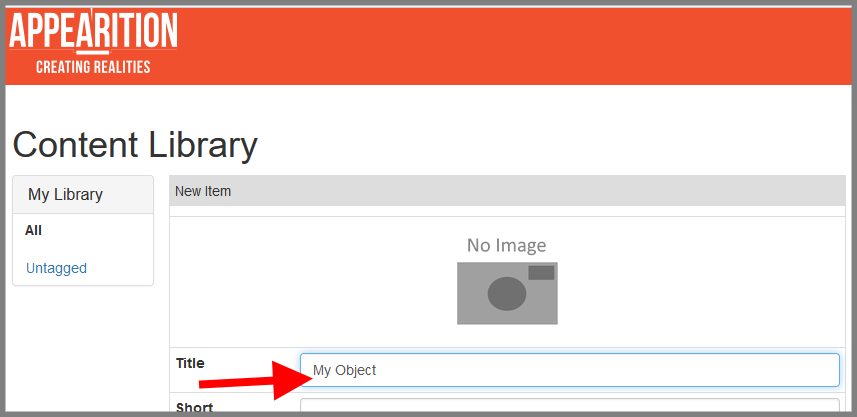
- In the New Item page enter a value for “Title”.
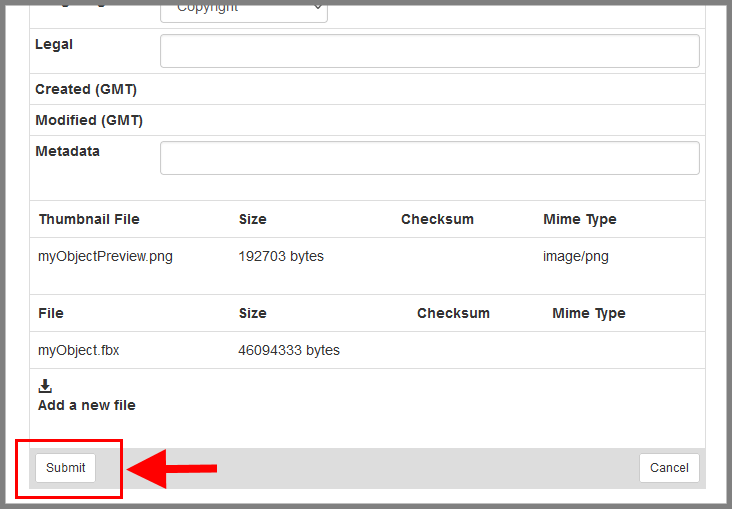
- You can add a thumbnail image for your file. Scroll down to the bottom of the form and click the “Choose a thumbnail file” and follow the File Dialog prompts.
- Click the Submit button at the bottom of the page and wait until the files have been uploaded

5. Creating your first AR experience#
Once you have prepared and uploaded your content to the Appearition Platform, you will be ready to create an AR experience.
The following steps will guide you to creating a marker based WebAR experience:
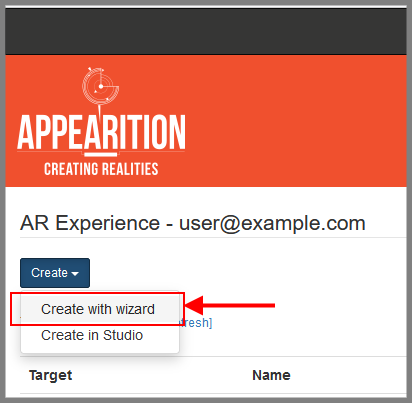
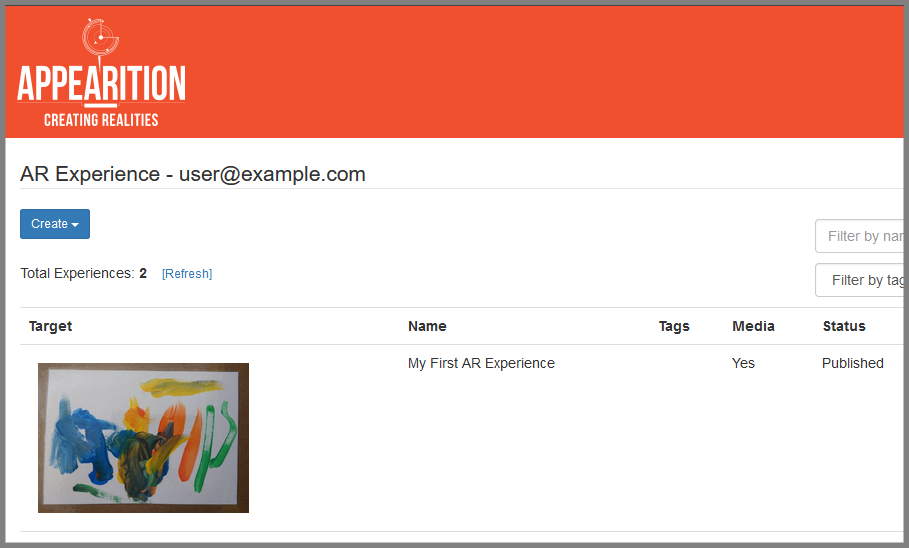
- Navigate to your Channel’s AR experience list
- Click on the blue +Create button and choose Create with Wizard
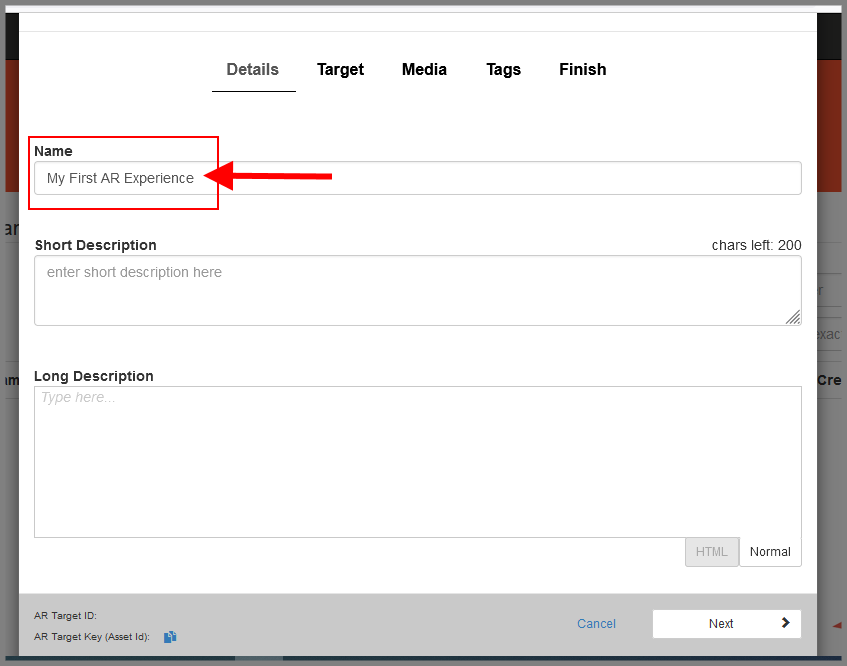
- Under Details give the experience a Name. Click Next button
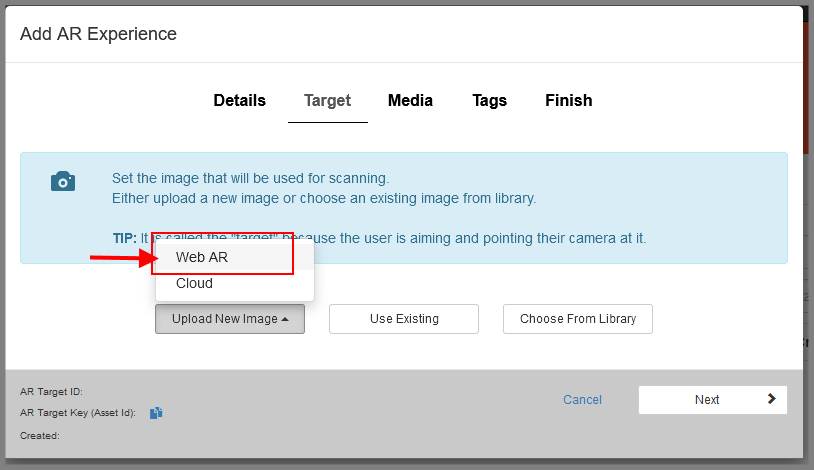
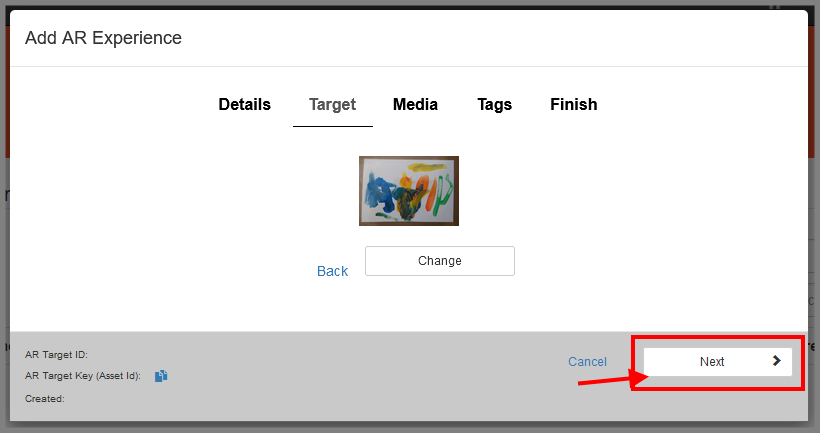
- Under Target choose Upload New Image and choose Web AR option. Click Next button after the following scans are completed
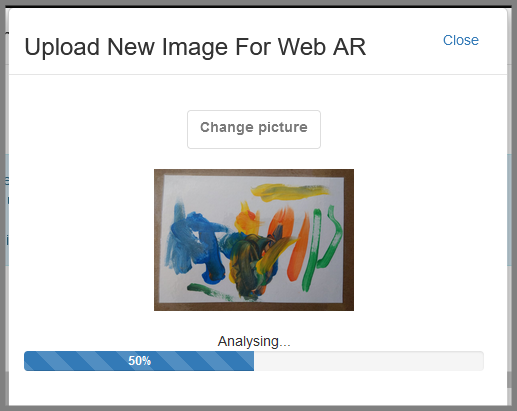
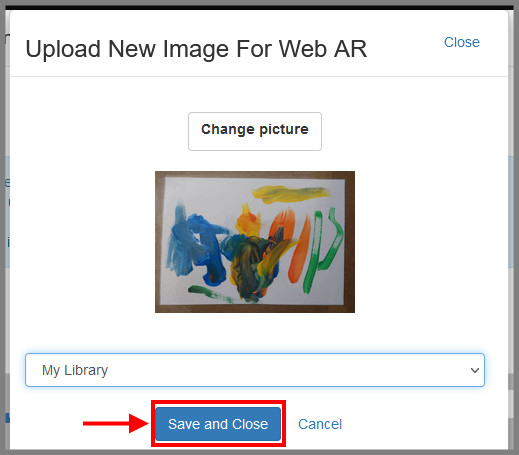
- In new dialog click Select a picture. In file dialog choose your image file ++
- Once image file is selected the Platform will run feature recognition scans on the image - wait until progress finishes
- When feature recognition is completed save the item to your Content Library and close the dialog by clicking Save and Close.
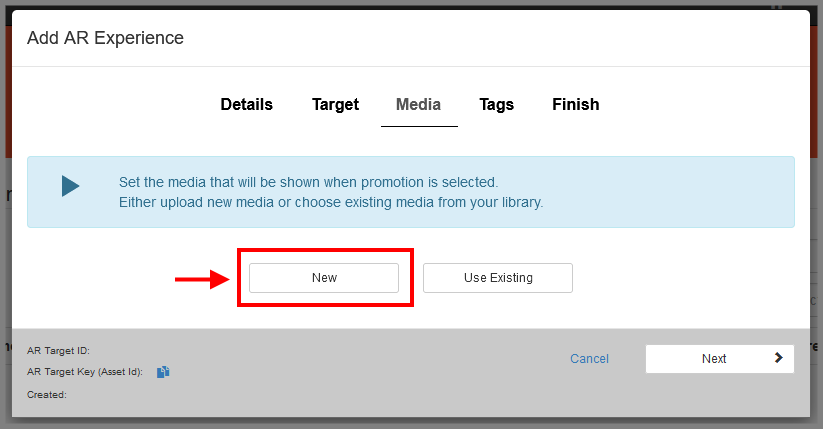
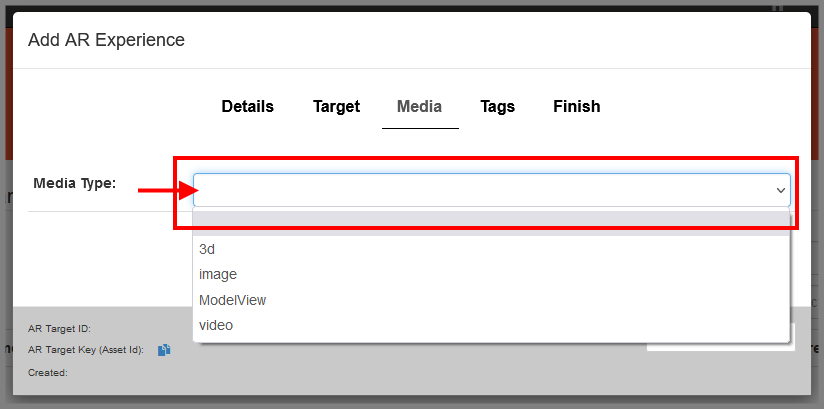
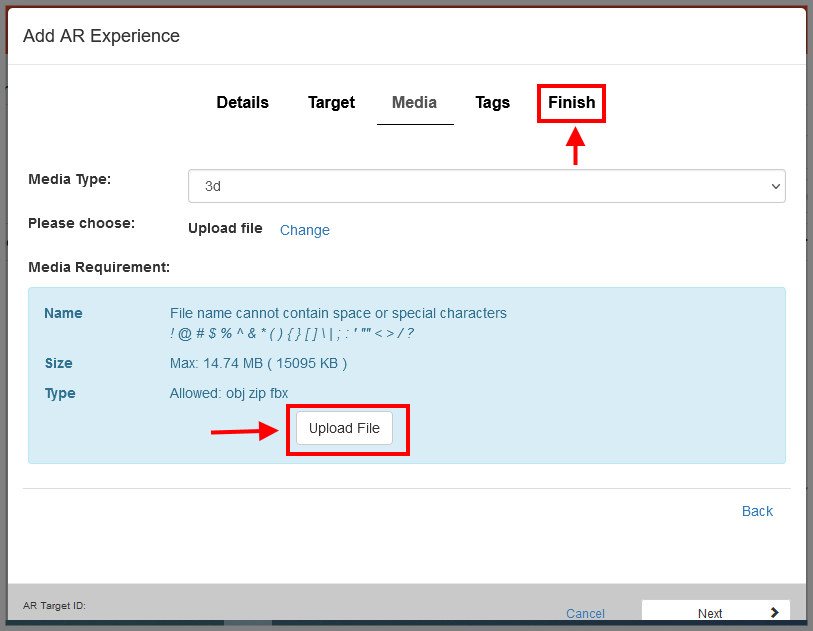
- Under Media choose New, choose your media type+++ then follow the Upload dialog instructions. Once uploaded you can skip over creating a Tag and click on the Finish Link.

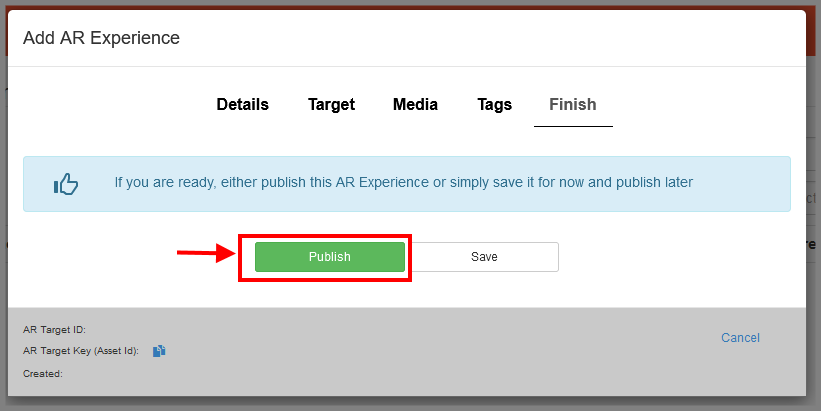
- Under Finish choose Publish if want to publish immediately. Otherwise choose Save
Choosing a target image
++ For optimal performance choose an image that has lots of different detail. It should contain contrasting shapes, lines and colours with minimal repetitive patterns. The image must also be in a jpg, jpeg or png file format and the resolution should be between 400x300 to 1000x1000 pixels.
Media Type
+++ Media type relates to the type of content you want to show your viewers.
For WebAR marker based experiences, only these media types are supported: Image, Video and 3d.
For WebAR markerless experiences, you will need to choose the Modelviewer media type.
Creating a WebAR markeless experience
Click here for a tutorial on markerless experiences using browser based WebAR
6. Share your AR experience#
Now that you have created your experience, you will need to setup access and pick up a QR code for sharing.
- Select the AR experience from the list of records
- Ensure you have published the AR experience via the Status tab
- Click on the WebAR tab:
- Enable Anonymous Access
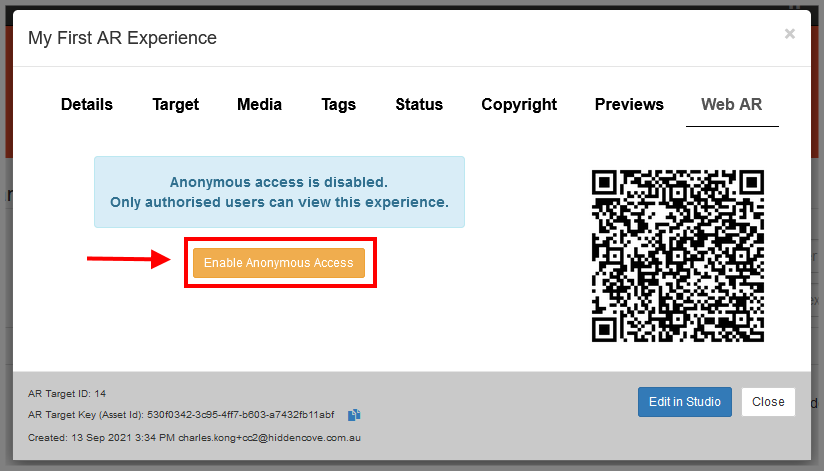
- Select your Registered Application
- Click Save
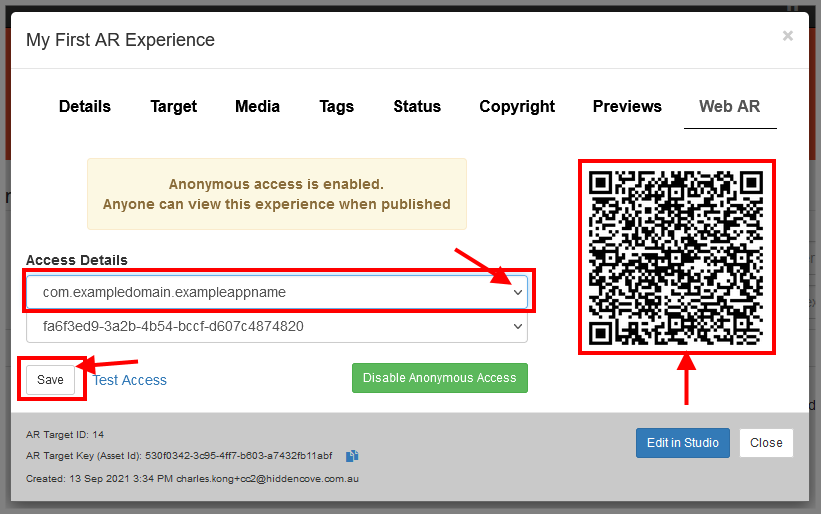
- Enable Anonymous Access
- You can now copy the QR code image and/or web link and share that with your viewers
Note
It is a good idea to test the QR code first before sharing. Using your own mobile device, scan the QR code with your camera or prefered QR scanner app to launch the WebAR experience.
WebAR vs Native Apps#
So far you have learnt about creating AR experiences for sharing and viewing via WebAR. In the previous sections we talked about the different types of triggers (i.e. marker based and markerless), the different types of content (image, video and 3D) and the steps to prepare and upload your content onto the Appearition Platform. We also guided you on creating and sharing your first WebAR experience.
Now we need to explain that there is another type of app which can be used to view AR experiences… Native Apps
A native app is a custom built program for Android or iOS which must be manually installed by a user on their device. Since native apps are custom builds, richer and more immersive experiences can be viewed.
The following table provides an indication on how much more a native app can support over WebAR
| Content | File Format | Native App | WebAR | ||
| Marker based | Markerless | Marker based | Markerless | ||
| Image | jpg, jpeg, png | ✅ | ✅ | ✅ | ❌ |
| Video | mp4 | ✅ | ✅ | ✅ | ❌ |
| 3D | fbx | ✅ | ✅ | ✅ | ❌ |
| 3D | obj | ✅ | ✅ | ✅ | ❌ |
| 3D | gltf | ✅ | ✅ | ✅ | ❌ |
| 3D | glb | ✅ | ✅ | ✅ | ✅ Android only |
| 3D | usdz | ✅ iOS only |
✅ iOS only |
❌ | ✅ iOS only |
You can read and learn more on creating and viewing experiences via a native app here.
As this is an advanced concept and feature, please feel free to reach out to us for support and guidance.