User Management using API
Introduction#
The following tutorial is an example of how to implement different levels of user access within a tenant space on the EMS platform and how to initiate a user login with a mobile application. In order to use this tutorial a user must have the Admin or combination of UserManager, PersonaManager and Developer roles assigned. Depending on the subscription and level of support, configuration of the EMS can alternatively be done by an Appearition administrator.
Configuring the Tenant#
For more information regarding Tenants please refer to the Concepts section.
Activating the User Management Module#
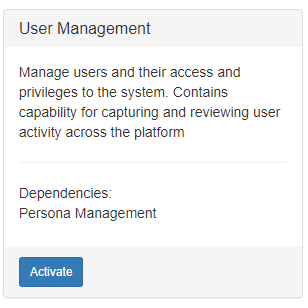
Enable user access by activating the User Management module. Navigate to your tenancy Settings, Activate Module page and find the User Management module tile. Click on the Activate button to install the module and its dependency module Persona Management.
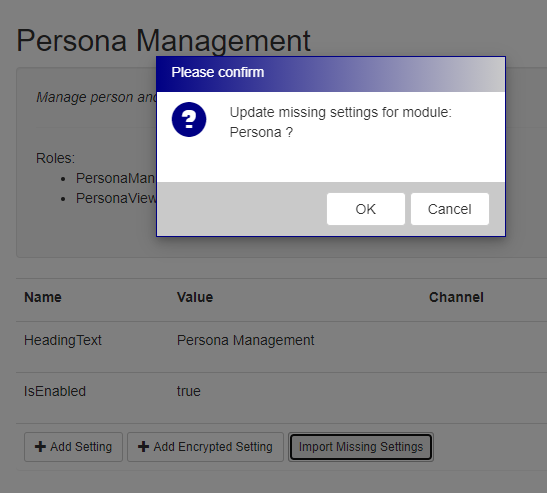
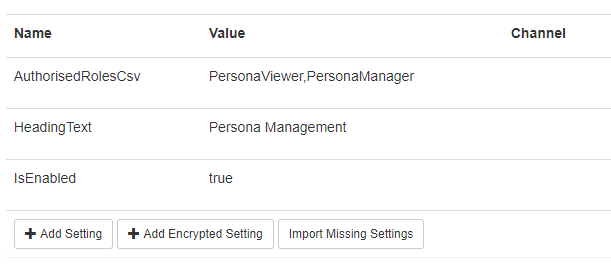
Using the navigation pane on the left of the Settings page open User Management settings. If setting AuthorizedRolesCsv is missing, click on button Import Missing Settings. Go to Persona Management settings and do the same if AuthorizedRolesCsv is missing.
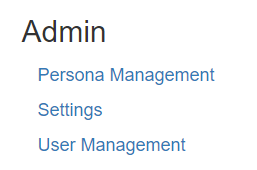
Scroll to the top of the Settings page and click on Flush Entire Cache to refresh the portal. Navigate to the Welcome Home page and new items Persona Management and User Management will be available.
Creating Different Access Levels with Personas#
Before user accounts can be issued, Personas must be created to define each user type’s level of access.
For additional information about the roles, settings and APIs associated with this module, please refer to section Persona Management in Modules documentation.
For this example we’ll use a simple hierarchy of teacher and student with the following access:
- Teacher - create new Students on the platform, create & publish experiences on the platform. The predefined Roles which encapsulate this access are UserManager, ArCreator and ArPublisher
- Student - view experiences via a client application. A predefined Role which describes this access is User
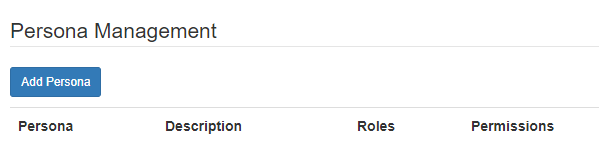
Logged in as an Admin or PersonaManager, proceed to the Welcome Page , navigate to Persona Management under the Admin section. Create a new persona by clicking on the Add Persona button.
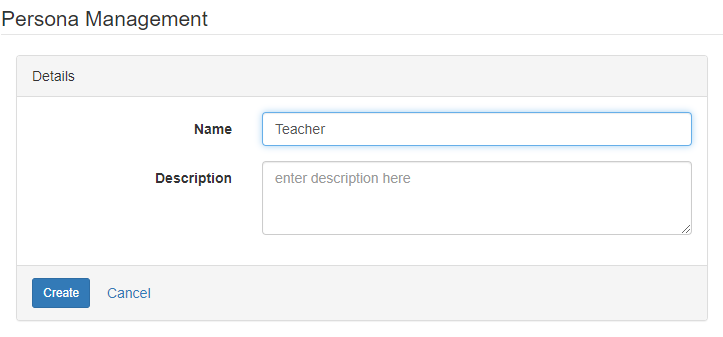
In this example we’ll create the Teacher persona.
In the Details pane type in Teacher into the Name field. The Description field can be left blank. Proceed to the next step by clicking on the Create button.
Several new panes will appear once the page has reloaded.
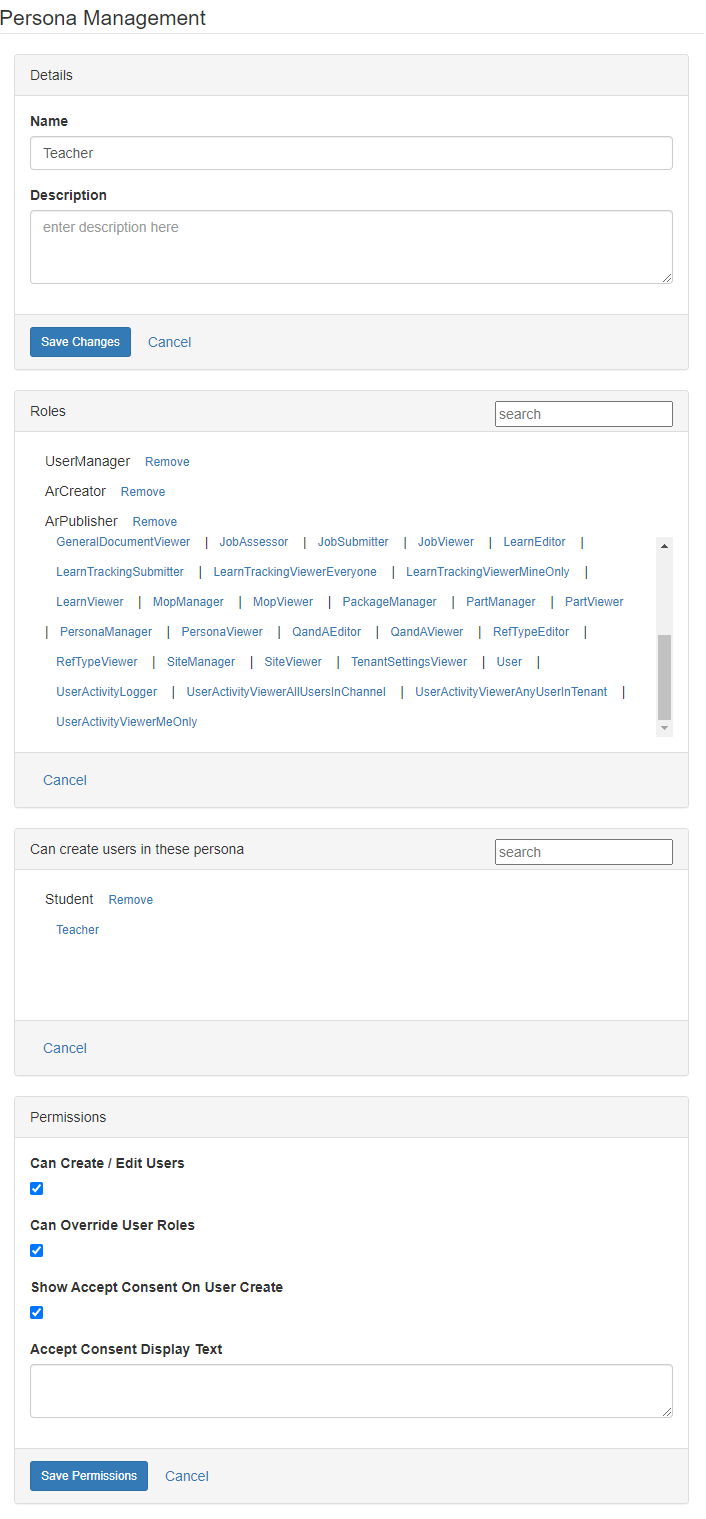
- In the Roles pane choose the UserManager, ArCreator and ArPublisher roles and click OK when prompted in the Please Confirm dialog box
- In the Can create users in these persona pane choose existing Personas Teacher can create (in this example it would be the Student Persona if it exists)
- In the Permissions pane
- Tick Can Create/Edit Users. This enables this persona to create users of persona types defined in the previous pane
- Tick Can Override User Roles. This enables this persona to edit access levels for users in their tenancy
- Tick Show Accept Consent On User Create. An additional Consent pane will appear when creating new users to ensure consent has been granted by the user or their legal guardian to create their user accounts
- You can leave the Accept Consent Display Text field blank. The consent tick box label defaults to “I have consent to create this user”.
Click on Save Changes button under the Details pane once completed
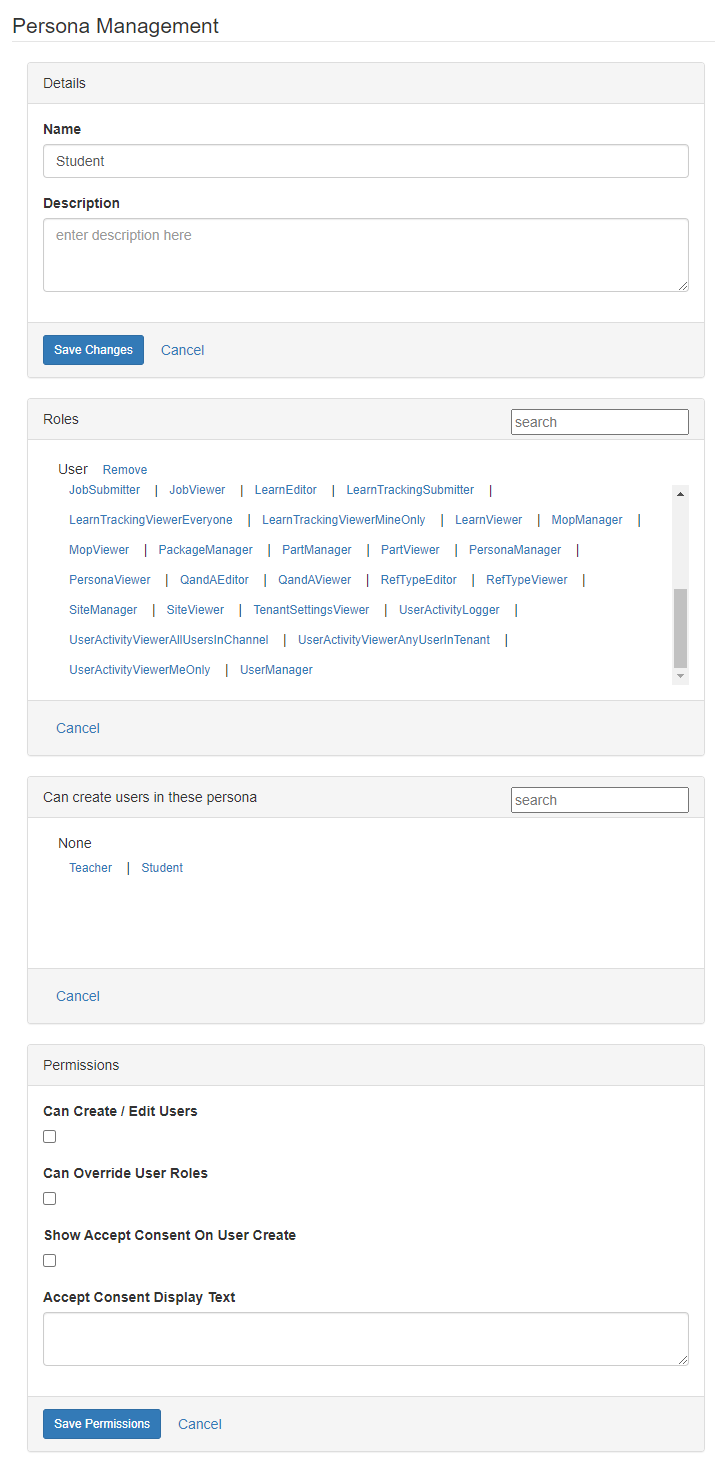
When creating the Student persona follow the above steps but choose the User Role only and leave the remaining fields unselected/blank.
Creating Users#
Logged in as an Admin or UserManager, proceed to the Welcome Page and navigate to User Management under the Admin section. Create a new user account by clicking on the Add User button.
For additional information about the roles, settings and APIs associated with this module, please refer to section User Management in Modules documentation.
In the User Management page there are 3-5 sections to fill in.
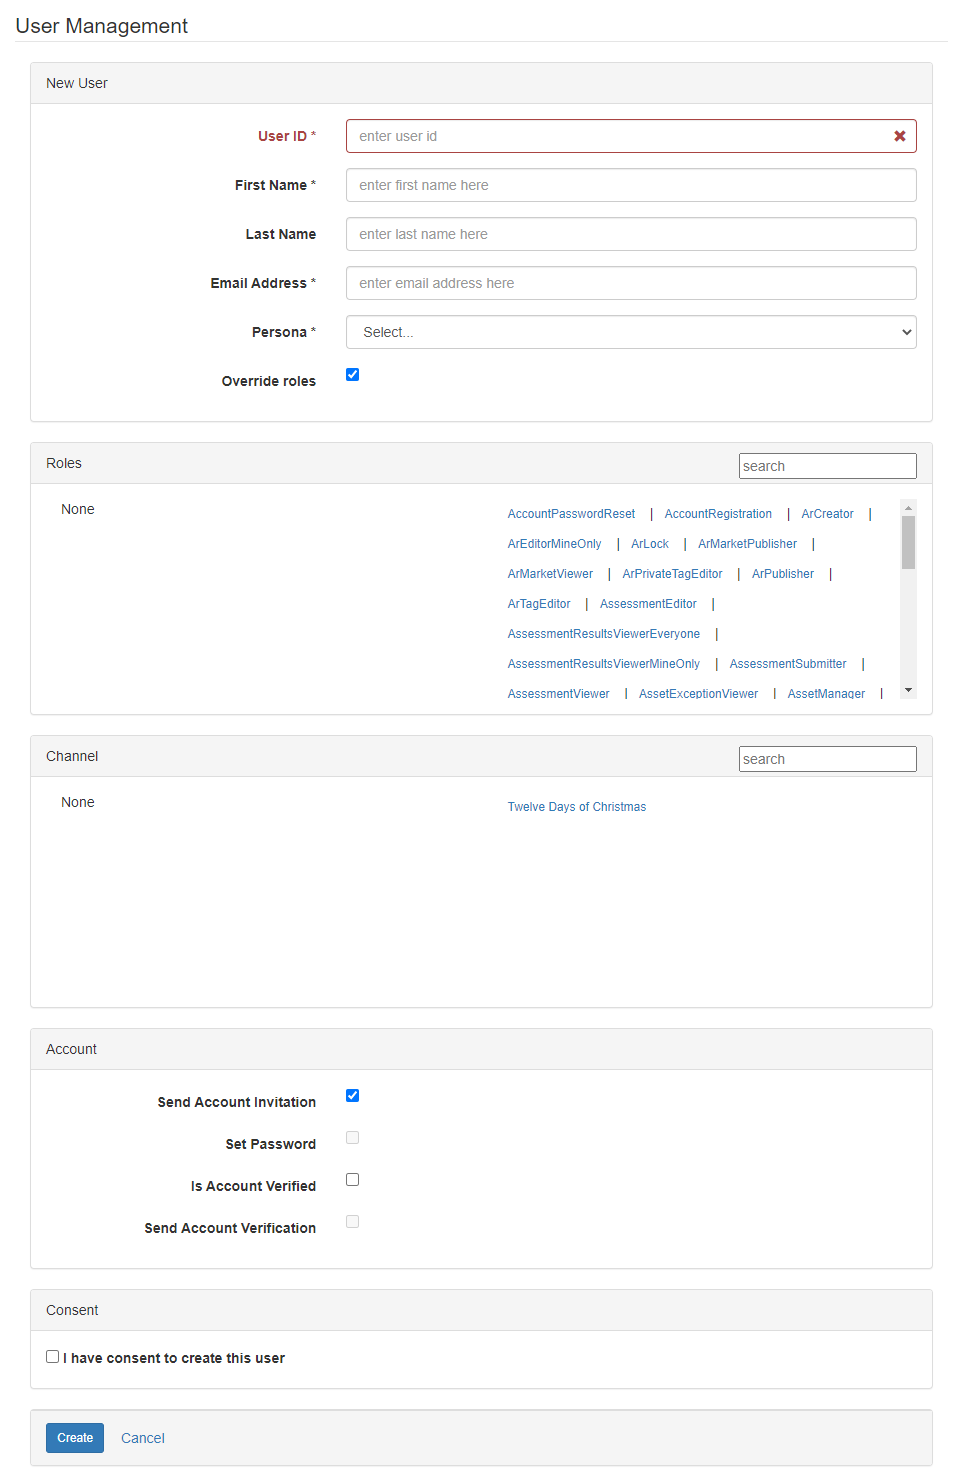
- New User
- User ID - mandatory username. Alphanumeric characters and email characters only
- First Name - mandatory
- Last Name - optional
- Email Address - mandatory
- Persona - mandatory. Choose from Personas created in previous section of tutorial
- Override roles - optional. Will reveal another section to add additional access to this user
- Roles (if Override roles from pervious section is ticked) - select additional access for this user
- Channel - select which experience channels the user will have access to
- Account
- Send Account Invitation - if ticked an invitation will be sent to user’s email address to verify their registration and set their password
- Set Password - if ticked you may set the password for the user (new Password and Confirm Password fields will appear)
- Is Account Verified - tick if the new account does not need email verification
- Send Account Verification - if ticked an email will be sent to the user to verify the registration
- Consent (if Show Accept Consent On User Create was ticked in Persona settings) - tick if consent has been granted by the user or user’s legal guardian
Once completed click on the Create button.
Verifying a user account via Swagger#
Logged in as an Admin or Developer, proceed to the Welcome Page and navigate to API Access under the Developer section.
For a detailed description of how to register an application and obtain an anonymous API token, please refer to section Application Registration in API Access documentation.
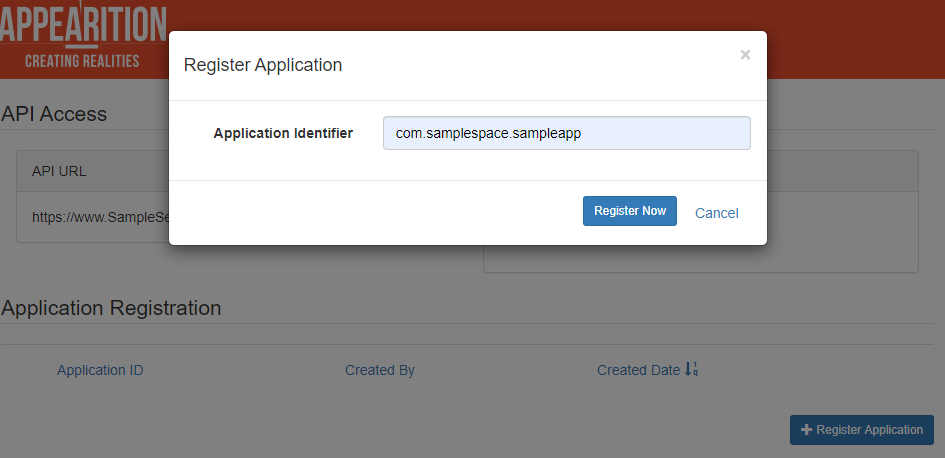
In this tutorial we have
- Navigated to API Access, clicked +Register Application button and used identifier “com.samplespace.sampleapp”
- Still in API Access, use Edit link next to the application identifier to modify access

- In Edit Dialog
- Roles - none required for this tutorial. However it’s recommended during the app development phase to select Admin.
- Channel - select channels the application should access
- API Access-Active - click on button +Add API token.
The following shows how to run an API check on the EMS to validate the sample application and associated users’ credentials.
For a detailed description of how to use Swagger to authenticate a user with an API token, please refer to section Application Registration in API Access documentation.
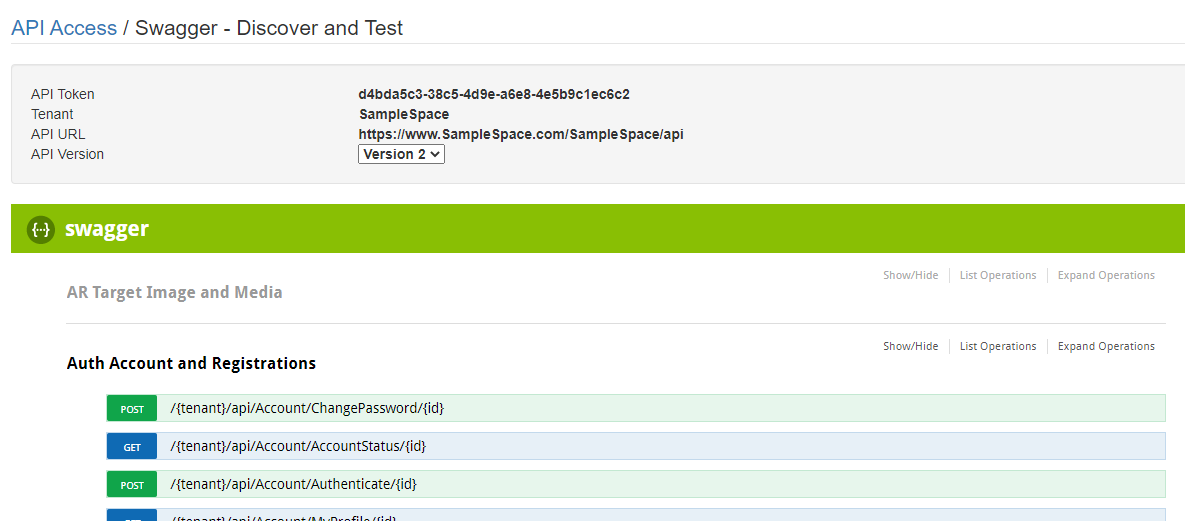
In this tutorial we have
- Navigated to API Access, use Swagger link next to the application identifier
- At the top of the page there are several server and API variables. For API Version, choose Version 2 from the dropdown
- Under the refreshed Swagger section click on Auth Account and Registrations. Select POST /{tenant}/api/Account/Authenticate/{id}
- In the expanded API pane
- Under Parameters, click on the Model Schema containing username, password and appId. This will paste the schema template to the Value field
- Update the string values with a User ID for username, password for password and application identifier for appId.
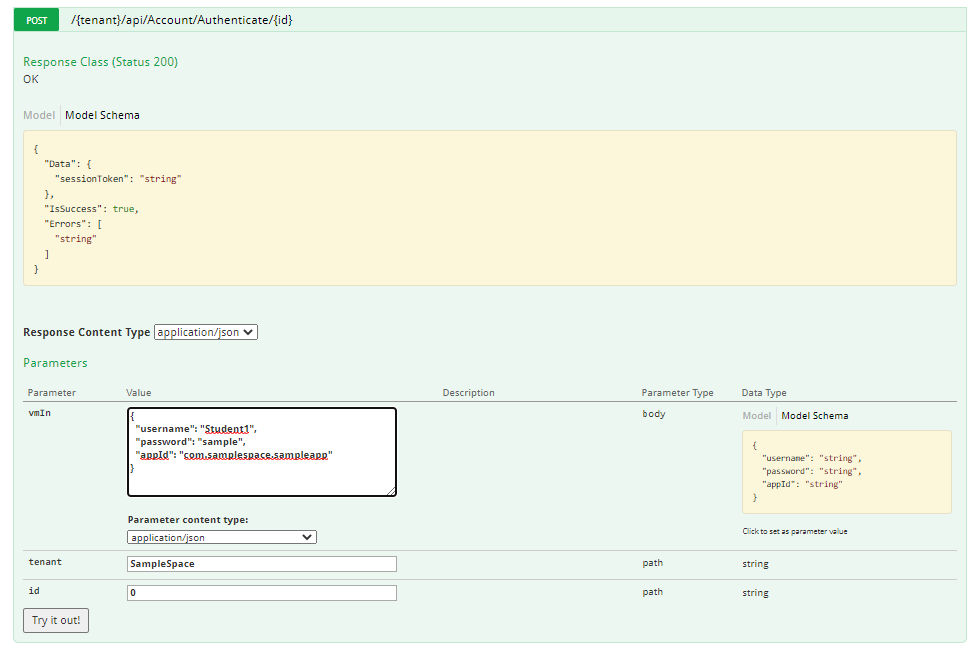
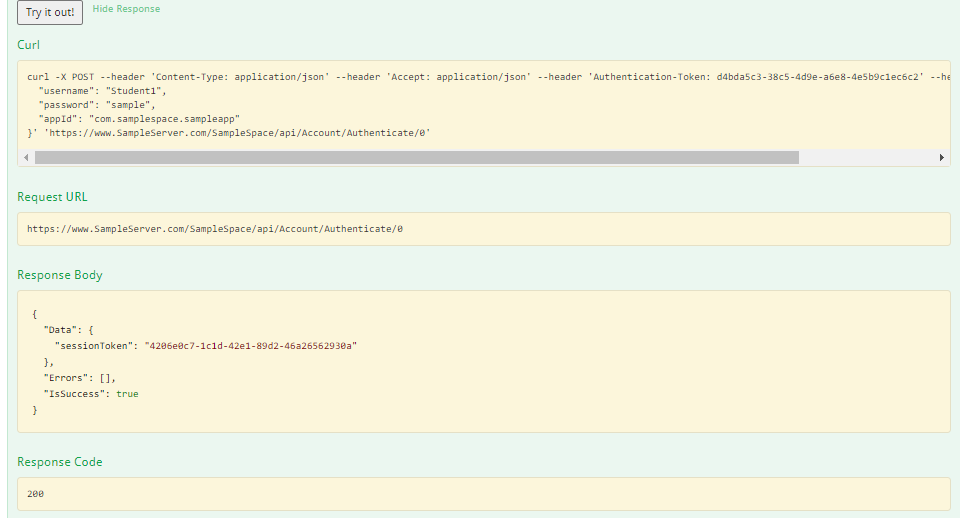
- Click the Try it out! button. The pane will expand further with the response
- Check Response Body. If successful a session token should have been sent back. This token will be used in the header for other APIs as the new value of parameter Authentication-Token
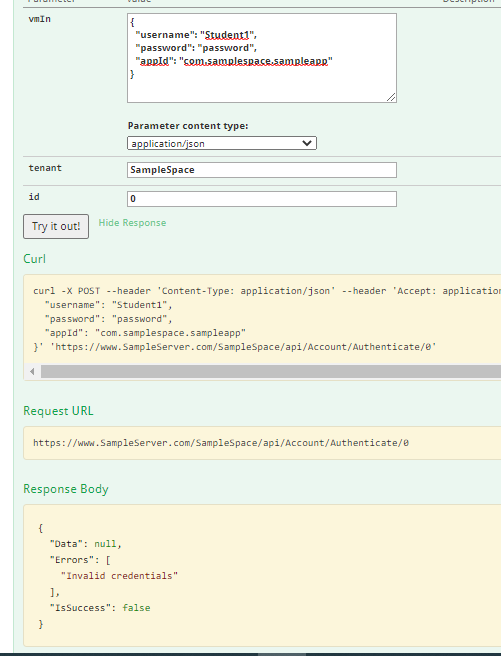
As a comparison, here is the response body when the credentials are invalid.
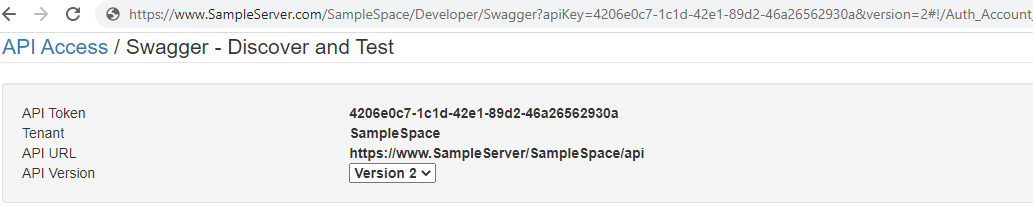
To use this session token with other APIs on the API Access page, it must be set as the API Token parameter at the top of the page. This can be changed by modifing the apiKey value in the browser URL to match the session token.
User Login with a client application#
Once the user authentication API passes sanity checks on the server we can start implementation with a client mobile application. In this tutorial we’ll use a standard Android Login Activity template in Android Studio to begin.
- Create New Project and from the templates presented choose Login Activity. In this example we’ve picked Java with support for minimum SDK Andrroid 8.0 Oreo (API 26)
- As a pre sanity check try building the project and running it on a mobile device to confirm if any dependencies are missing. When the app is successfully running you’ll find that all it does is check text input for empty or number of characters and show a toast message when pressing the SIGN IN button
- The following modifications will be applied to integrate the app with the Authentication API and MyProfile API
- Give the app permission to access the INTERNET
- When pressing the SIGN IN button
- send an HTTPS request for user authentication to the EMS server using the username and password values from the text fields and anonymous Authentication Token and application identifier defined in previous steps
- parse through the server’s response and if valid extract the session token
- save the token to a file in private data storage
- A new activity will be started. When created
- send an HTTPS request for user profile data to the EMS server using the session token stored in private data storage
- parse through server’s response and extract the First Name
- update the activity view by displaying a welcome message with the extracted First Name
- In file AndroidManifest.xml add
<uses-permission android:name="android.permission.INTERNET" /> - Open file LoginActivity.java. To prevent the app from automatically logging in after pressing the SIGN IN OR REGISTER button in the app layout or DONE button on the soft keyboard remove or comment out all instances of
loginViewModel.login(usernameEditText.getText().toString(), passwordEditText.getText().toString()); - Create a new AsyncTask sub class in LoginActivity.java to handle the HTTPS authentication request. The following code snippets show a curl request and the java equivalent to initiate a HTTPS request, add header information and JSON keypairs to the request and store the EMS server’s response in a string variable
curl -X POST --header 'Content-Type: application/json' --header 'Accept: application/json' --header 'Authentication-Token: d4bda5c3-38c5-4d9e-a6e8-4e5b9c1ec6c2' --header 'API-Version: 2' -d '{
  "username": "username_value",
  "password": "password_value",
  "appId": "com.samplespace.sampleapp"
}' 'https://www.SampleServer.com/SampleSpace/api/Account/Authenticate/0'
    protected String doInBackground(String... strings) {
                URL apiUri;
                HttpsURLConnection apiConnection = null;
                JSONObject apiData;
                String apiResponse="";
                try {
                    apiUri = new URL("https://www.SampleServer.com/SampleSpace/api/Account/Authenticate/0");
                    apiConnection = (HttpsURLConnection) apiUri.openConnection();
                    apiConnection.setRequestMethod("POST");
                    apiConnection.setRequestProperty("Content-Type","application/json");
                    apiConnection.setRequestProperty("Accept","application/json");
                    apiConnection.setRequestProperty("Authentication-Token","d4bda5c3-38c5-4d9e-a6e8-4e5b9c1ec6c2");
                    apiConnection.setRequestProperty("API-Version","2");
                    apiData = new JSONObject();
                    apiData.put("username",strings[0]);
                    apiData.put("password",strings[1]);
                    apiData.put("appId","com.samplespace.sampleapp");
                    OutputStream apiRequestOutputStream = apiConnection.getOutputStream();
                    BufferedWriter apiRequestBufferedWriter = new BufferedWriter(new OutputStreamWriter(apiRequestOutputStream,"UTF-8"));
                    apiRequestBufferedWriter.write(String.valueOf(apiData));
                    apiRequestBufferedWriter.close();
                    apiRequestOutputStream.close();
                    BufferedReader in=new BufferedReader(new InputStreamReader(apiConnection.getInputStream()));
                    StringBuffer sb = new StringBuffer("");
                    String line="";
                    while((line = in.readLine()) != null) {
                        sb.append(line);
                        break;
                    }
                    in.close();
                    apiResponse =  sb.toString();
                } catch (Exception e) {
                    e.printStackTrace();
                }
                return apiResponse;
            }
- In the same AsyncTask sub class, use the onPostExecute function to extract the session token and save to private storage. The following snippets show the expected response from the server, how to parse through the nested JSON response for the session token and how to save it to private storage.
{
  "Data": {
    "sessionToken": "60d22bae-3670-439e-a34f-982e51cbc9a0"
  },
  "Errors": [],
  "IsSuccess": true
}
protected void onPostExecute(String result) {
            String sessionToken = "0";
            try {
                JSONObject jsonResponse = new JSONObject(result);
                JSONObject jsonResponseData = new JSONObject(jsonResponse.getString("Data"));
                sessionToken = jsonResponseData.getString("sessionToken");
            } catch (JSONException e) {
                e.printStackTrace();
            }
            if (sessionToken!="0")
            {
            try(FileOutputStream fos = getApplicationContext().openFileOutput("sampledata", Context.MODE_PRIVATE)) {
                fos.write(sessionToken.getBytes());
            } catch (FileNotFoundException e) {
                e.printStackTrace();
            } catch (IOException e) {
                e.printStackTrace();
            }
            }

        }
- Modify the login button onClickListener to run the AsyncTask with username and password from the text fields as parameters. Example
        loginButton.setOnClickListener(new View.OnClickListener() {
            @Override
            public void onClick(View v) {

                apiRequest authenticateApiRequest = new apiRequest();
                authenticateApiRequest.execute(usernameEditText.getText().toString(),
                               passwordEditText.getText().toString());
            }
        });
- In the same project Create New Activity and from the templates presented choose Blank Activity. Add a blank TextView element into the layout
- When starting this new activity we want to send an HTTPS request to the EMS server with the saved session Token. The following code snippet shows how to load the token string from the file in private storage
        String contents = "";
        FileInputStream fis = null;
        try {
            fis = getApplicationContext().openFileInput("sampledata");
        } catch (FileNotFoundException e) {
            e.printStackTrace();
        }
        InputStreamReader inputStreamReader =
                new InputStreamReader(fis, StandardCharsets.UTF_8);
        StringBuilder stringBuilder = new StringBuilder();
        try (BufferedReader reader = new BufferedReader(inputStreamReader)) {
            String line = reader.readLine();
            while (line != null) {
                stringBuilder.append(line).append('\n');
                line = reader.readLine();
            }
        } catch (IOException e) {
            // Error occurred when opening raw file for reading.
        } finally {
            contents = stringBuilder.toString();
        }
- Create a new AsyncTask sub class in the new activity to handle the HTTPS user profile request. The following code snippets show a curl request and the java equivalent to initiate a HTTPS request, add header information and store the EMS server’s response in a string variable. Please note that the authentication token in the java code is passed to the HTTPS connection as a variable.
curl -X GET --header 'Accept: application/json' --header 'Authentication-Token: 60d22bae-3670-439e-a34f-982e51cbc9a0' --header 'API-Version: 2' 'https://www.SampleServer.com/SampleSpace/api/Account/MyProfile/0'
protected String doInBackground(String... strings) {
            URL apiUri;
            HttpsURLConnection apiConnection = null;
            JSONObject apiData;
            String apiResponse="";
            try {
                apiUri = new URL("https://www.SampleServer.com/SampleSpace/api/Account/MyProfile/0");
                apiConnection = (HttpsURLConnection) apiUri.openConnection();
                apiConnection.setRequestMethod("GET");
                apiConnection.setRequestProperty("Accept","application/json");
                apiConnection.setRequestProperty("Authentication-Token",strings[0]);
                apiConnection.setRequestProperty("API-Version","2");

                BufferedReader in=new BufferedReader(new InputStreamReader(apiConnection.getInputStream()));
                StringBuffer sb = new StringBuffer("");
                String line="";
                while((line = in.readLine()) != null) {
                    sb.append(line);
                    break;
                }
                in.close();
                apiResponse =  sb.toString();

            } catch (Exception e) {
                e.printStackTrace();
            }

            return apiResponse;
        }
- In the same AsyncTask sub class, use the onPostExecute function to extract the user’s first name and display in the activity view. The following snippets show the expected response from the server, how to parse through the nested JSON response for the user information and how to update a textView in the activity layout.
{
  "Data": {
    "customAttributes ": [],
    "emailAddress": "hw@samplespace.com.au",
    "firstName": "Harry",
    "lastName": "Windsor",
    "tenantKeys": [
      "SampleSpace"
    ],
    "tenants": [
      {
        "roles": [
          "User"
        ],
        "tenantKey": "SampleSpace",
        "tenantName": "Sample Space"
      }
    ]
  },
  "Errors": [],
  "IsSuccess": true
}
 protected void onPostExecute(String result) {
            String firstName = "0";
            try {
                JSONObject jsonResponse = new JSONObject(result);
                JSONObject jsonResponseData = new JSONObject(jsonResponse.getString("Data"));
                firstName = jsonResponseData.getString("firstName");

            } catch (JSONException e) {
                e.printStackTrace();
            }
            if (firstName!="0")
            {
                TextView helloTextView = (TextView) findViewById(R.id.textView);
                helloTextView.setText("Welcome "+firstName);
            }

        }
- Modify the new activity to retrieve the token from storage and send the HTTPS request during the onCreate callback.
        String contents = "";
        FileInputStream fis = null;
        try {
            fis = getApplicationContext().openFileInput("sampledata");
        } catch (FileNotFoundException e) {
            e.printStackTrace();
        }
        InputStreamReader inputStreamReader =
                new InputStreamReader(fis, StandardCharsets.UTF_8);
        StringBuilder stringBuilder = new StringBuilder();
        try (BufferedReader reader = new BufferedReader(inputStreamReader)) {
            String line = reader.readLine();
            while (line != null) {
                stringBuilder.append(line).append('\n');
                line = reader.readLine();
            }
        } catch (IOException e) {
            // Error occurred when opening raw file for reading.
        } finally {
            contents = stringBuilder.toString();
        }
        apiRequest profileApiRequest = new apiRequest();
        profileApiRequest.execute(contents);
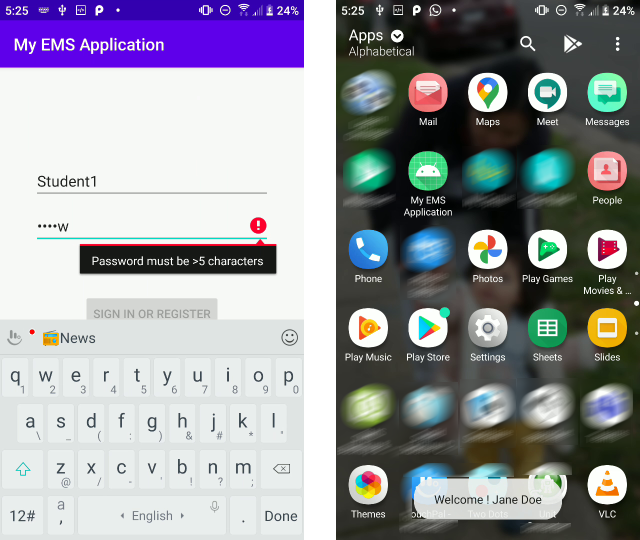
- Build and run the app. It should display behaviour similar to the following sequence
