Getting Started
Getting started with the Appearition SDK
(doc v3.0)
Appearition SDK for Unity
02/09/2019
What is the Appearition SDK#
The Appearition SDK is a library with the aim to wrap the Appearition EMS’s WebAPI’s features, and make them accessible from within Unity, in order to create cloud-based apps using the EMS’s full potential.
Its structure is meant to be the same as it is on the EMS, keeping the same module names and functionalities.
Requirements#
-
A decent understanding of Unity as a programmer
-
Unity 2019 LTS or newer
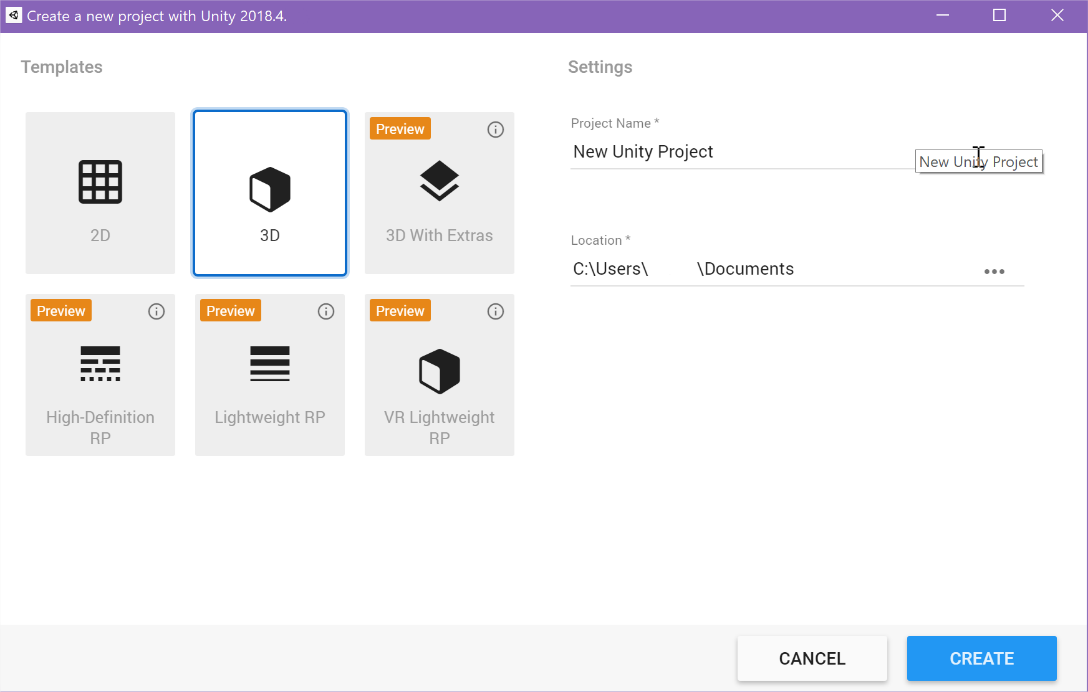
1.0 - Importing the Appearition SDK#
In order to the Appearition SDK, just drag and drop it in the Project window, as such:

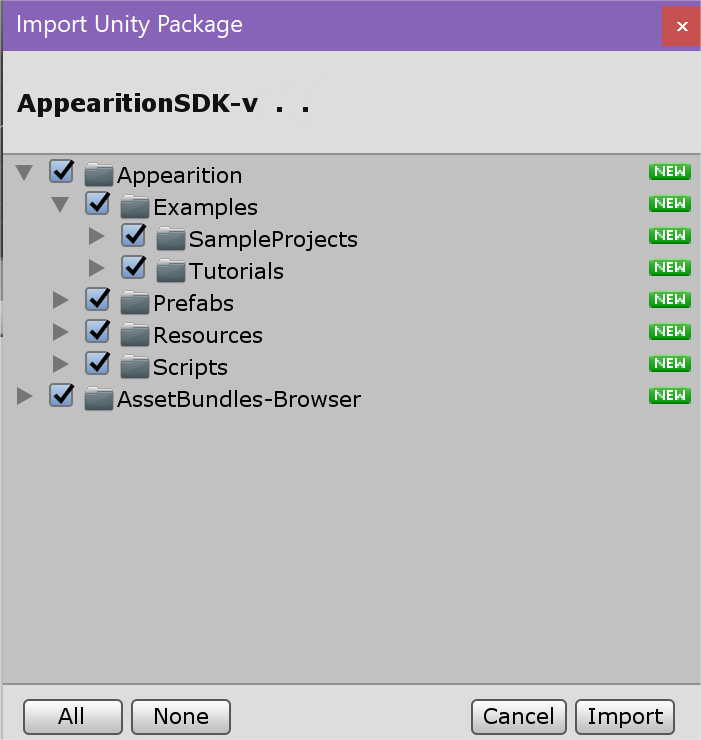
Once the SDK is imported in Unity, a welcome popup window will appear, which may look like the following:
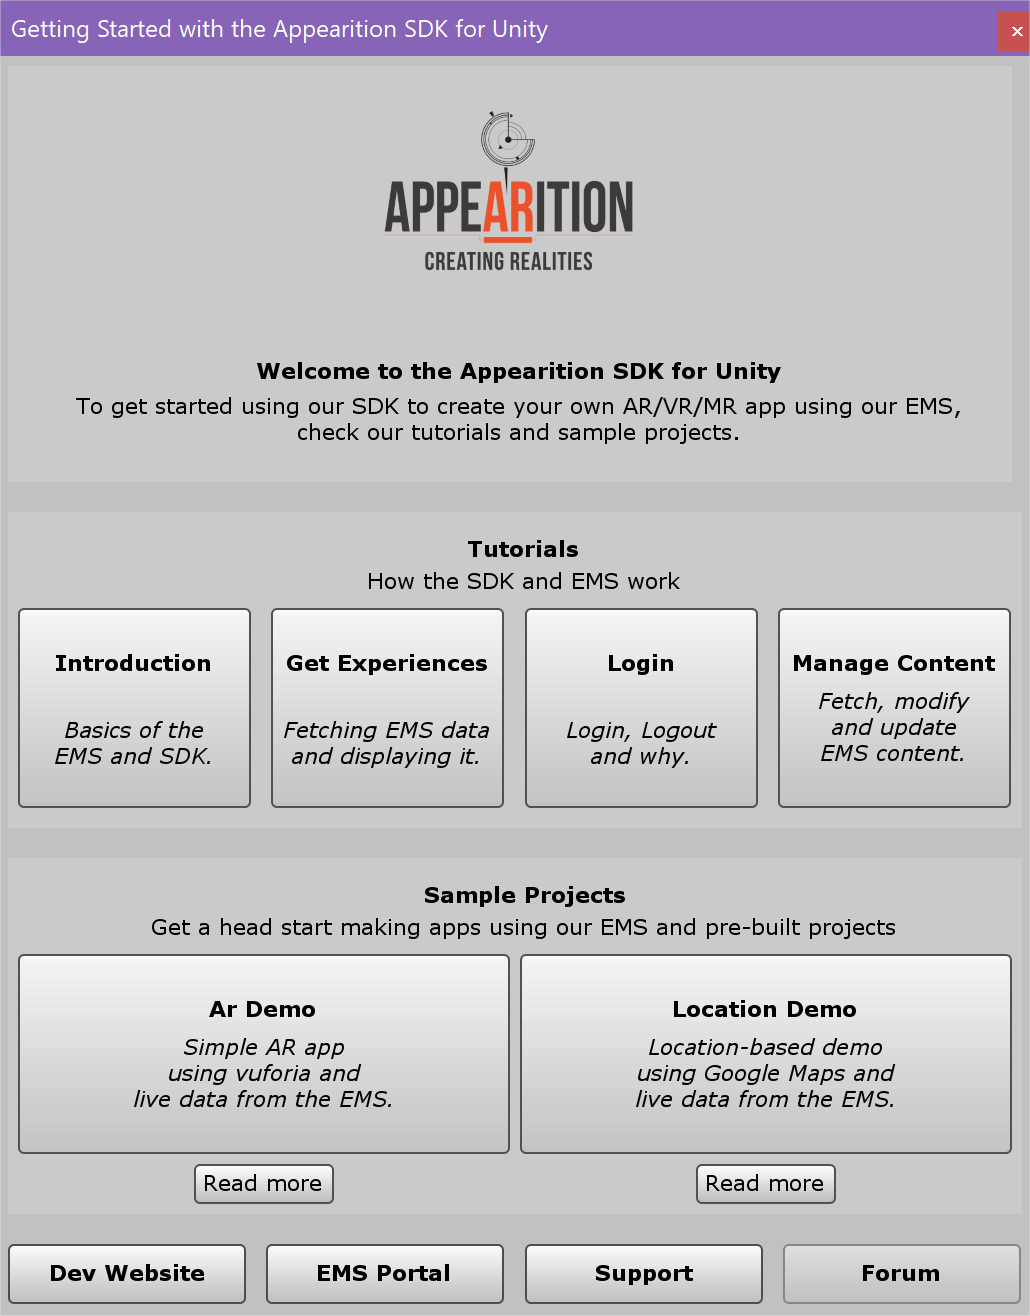
This window contains a link to the tutorial scenes, which you should check out if this is your first time working with the Appearition SDK for Unity. Additionally, it contains links to the sample projects, and other useful URLs.
If you have closed this window, you can find it again under Tools > Appearition Window.

Each tutorial scene contains a UI with information and features, which can be viewed and interacted with in Play Mode. Additionally, each script has been documented, and can be inspected to understand how each feature has been achieved.
We strongly recommend you to check out the 01-Introduction tutorial if this is your first time using the SDK.
2.0 - Understanding the Appearition SDK’s structure#
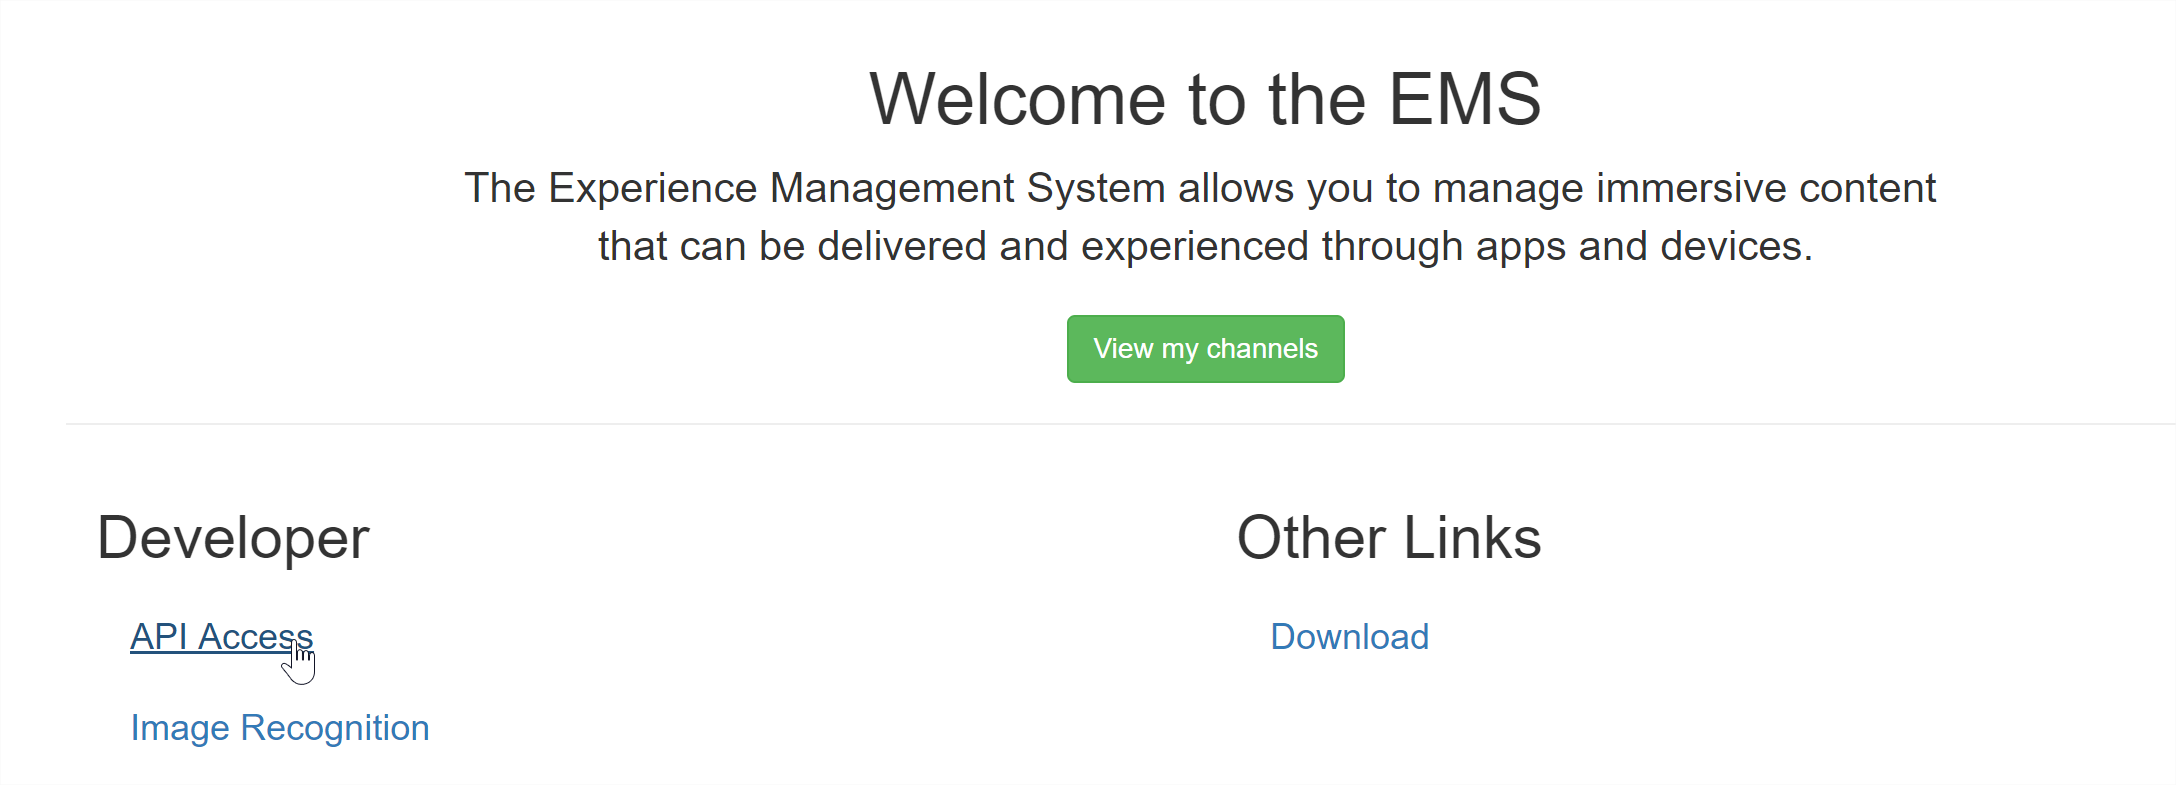
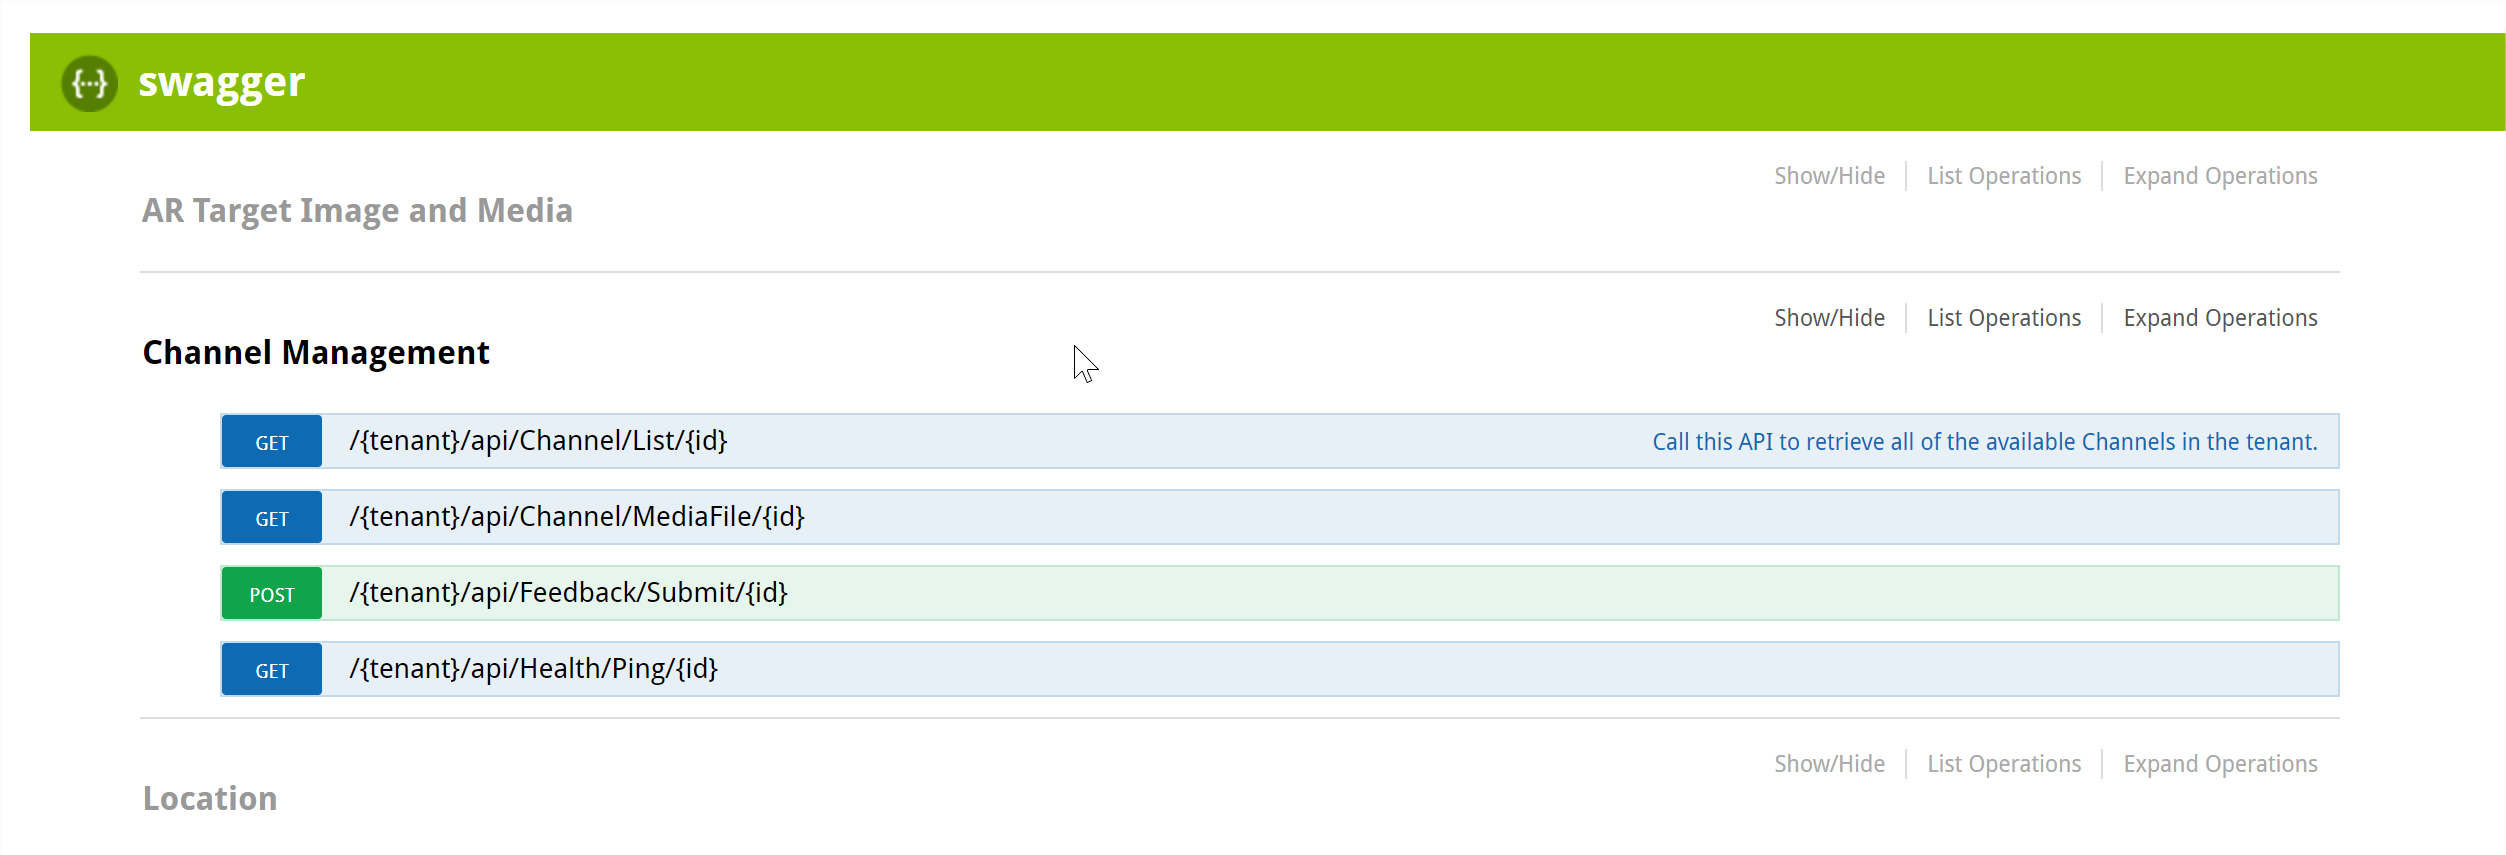
The SDK has been built in a way that it matches the same structure as the EMS. To understand this easily, you can head over to the EMS Portal, then API Access, and Swagger.

You will notice that each set of functionalities are stored as modules, eg ArTargetImageAndMedia.
Those same modules can be found in the SDK’s module folder, like so.
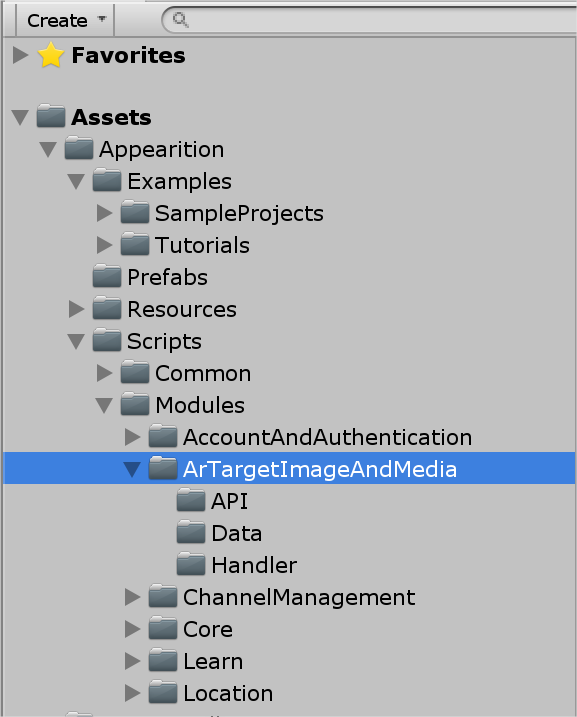
As shown above, each folder has several folders:
-
An API folder, containing each of the APIs currently implemented in the SDK (eg Asset/List).
-
Data, containing the storage classes for the EMS data for those specific APIs (eg Asset, MediaFile, etc)
-
Handler, which contains the main class that should be used to communicate with that specific module on the EMS.
More information about the APIs can be found in our API documentation on the developer website, available here.
Some examples of handlers are:
-
Account And Authentication -> AccountHandler, which contains Login, Logout and Profile features.
-
ArTarget Image And Media -> ArTargetHandler, which contains the CRUD functionality of the EMS Portal, allowing to manage the EMS’s content via the application.
-
Channel Management -> ChannelHandler, which contains utilities regarding channels, their settings and content.
-
Location -> LocationHandler, which contains access to the location data and Points Of Interest.
Additionally, there is a main manager called AppearitionGate, which is the core of the Appearition SDK. The Appearition Gate handles the following feature:
-
User Profile, containing the tokens and information being used to access the EMS.
-
Media utilities, to download, store and load Media and Media content easier.
-
EMS Ping, internet checks and other neutral communications with the EMS.
-
Contains all the processes currently running as coroutines.
3.0 - Using the Appearition SDK#
To get started using the Appearition SDK for Unity, you will need the AppearitionManager to be present in your scene. This prefab can be found under Appearition/Prefabs. Alternatively, you can create a new GameObject and add the AppearitionGate component on it.
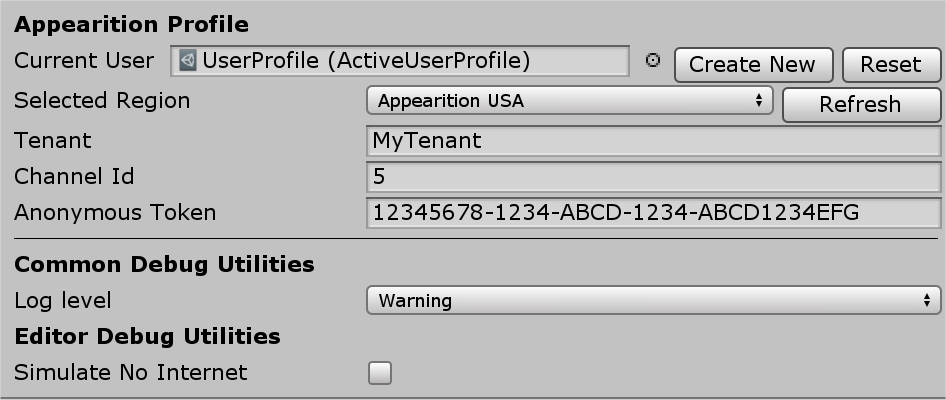
The Appearition Gate may look like this:
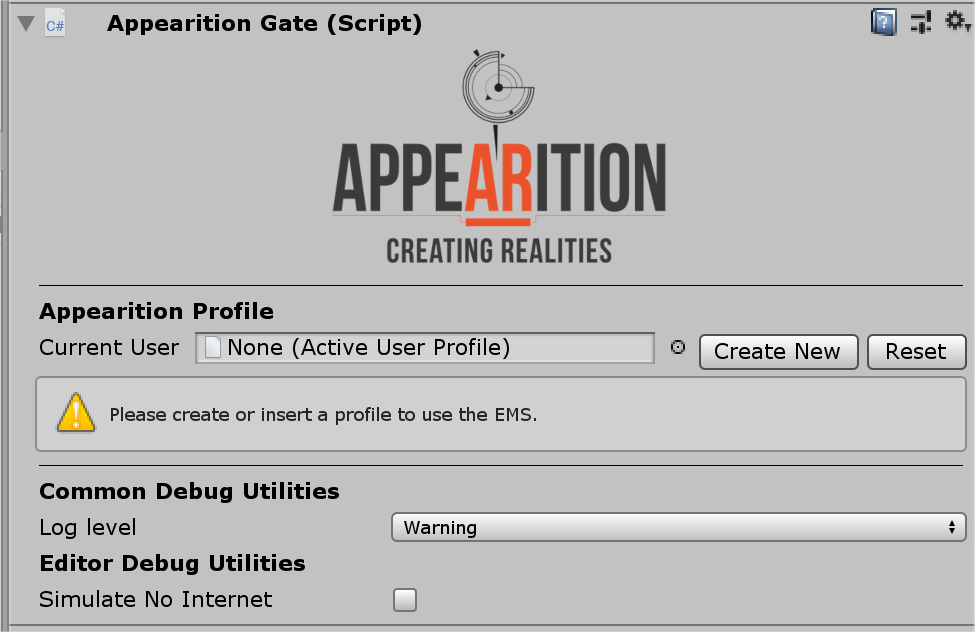
Do note that this may vary based on your SDK version and Unity pro theme.
In order to proceed, you will need to Create a User Profile, which contains information about what EMS, Tenant, Channel and authentication token. Those user profiles are meant to help switching EMS settings quickly, enabling fast development and better multi-user handling and can be serialized.
In order to create one, click on the Create Data button.
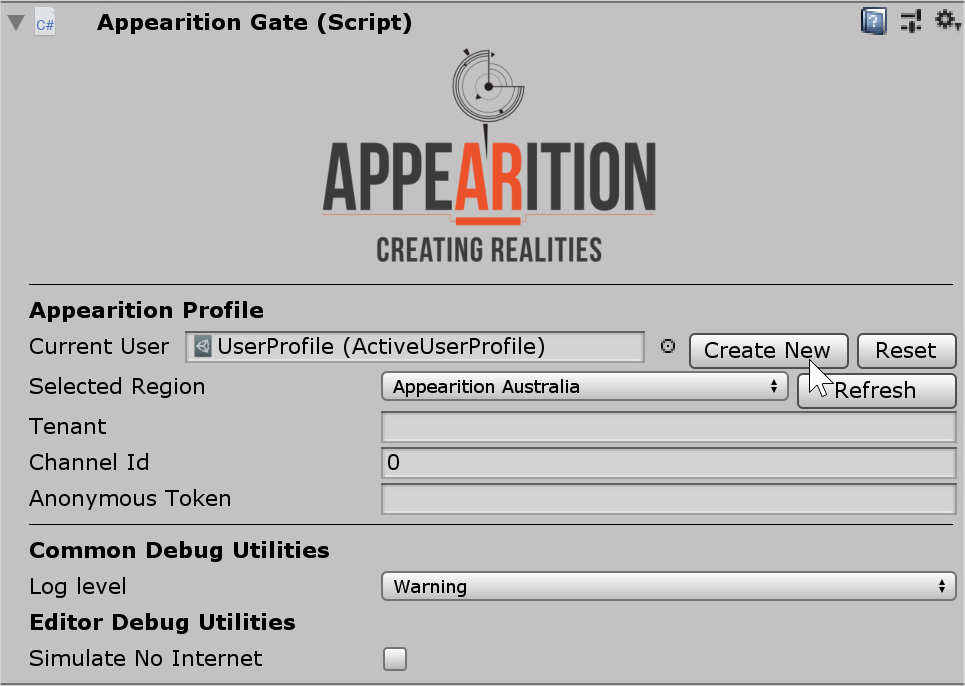
-
The End Point corresponds to which EMS platform you will be communicating with.
-
By default, the end point should be Appearition USA. You can double-check by looking at the URL on the EMS portal, and that it contains LoginUSA.

-
-
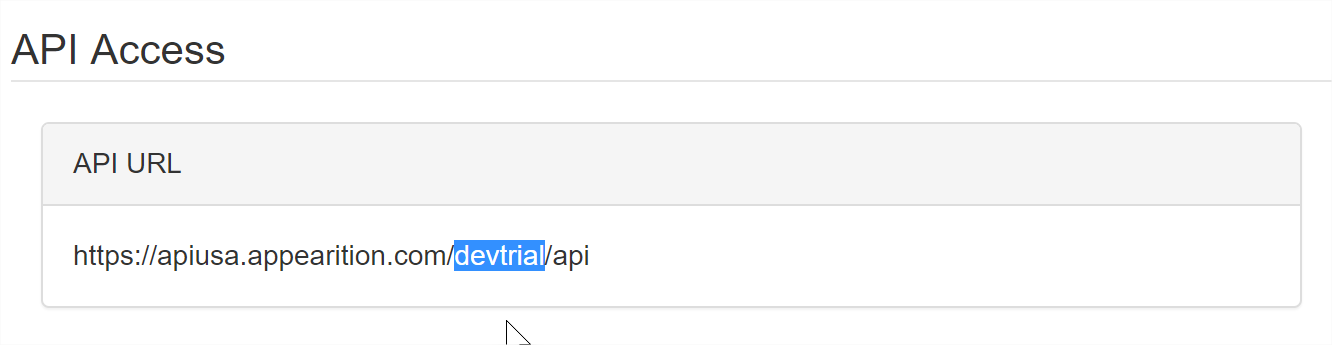
The Tenant refers to the Tenant Key and can be found on the EMS Portal. The tenant key can be either found on the URL or in the API Access.

-
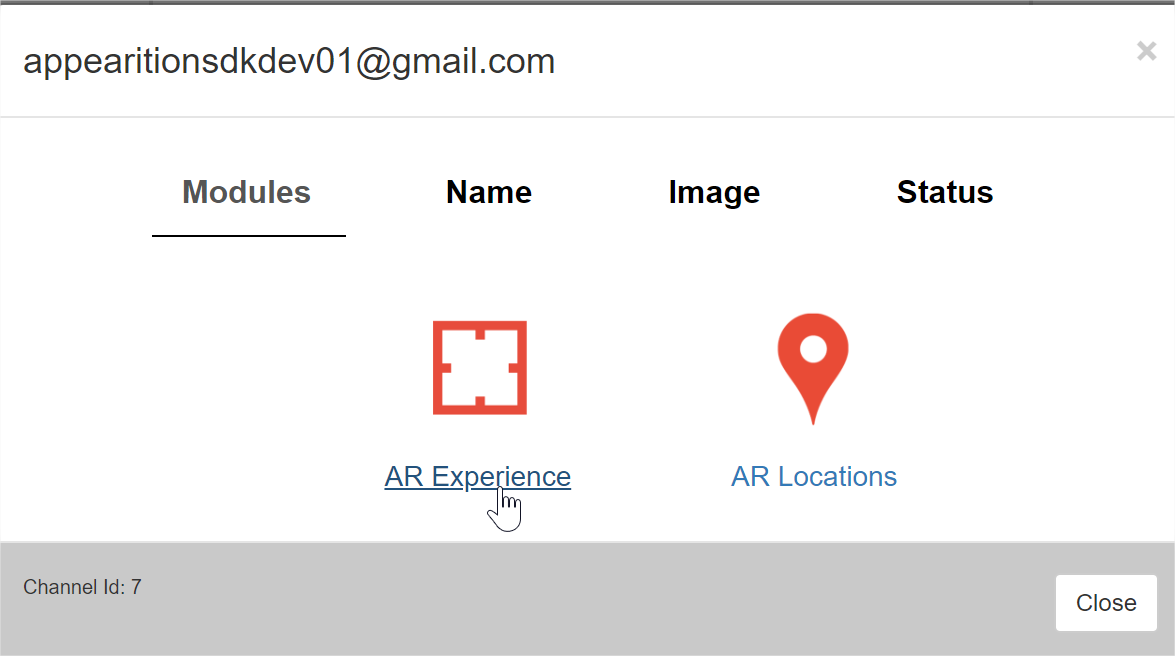
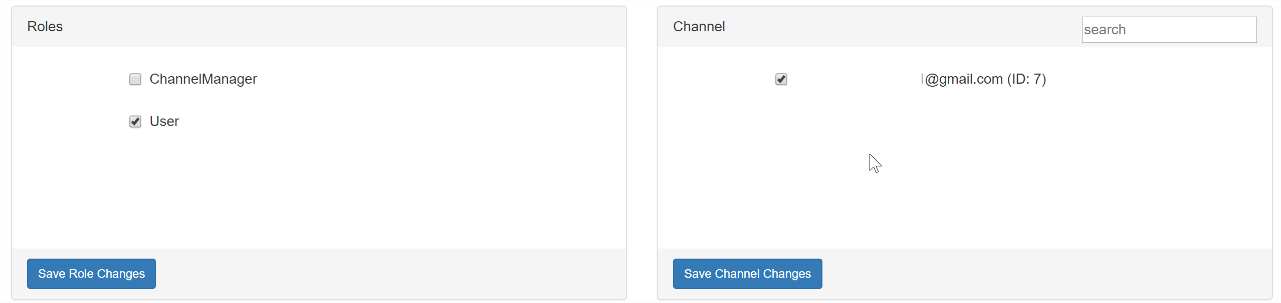
The Channel Id refers to the id of the channel you will be targeting. 0 Will effectively target all the channels in the selected tenant which you can access.
-
Your channel can be found in the URL upon selecting a channel.

-
Or at the bottom of the channel selection window
-
-
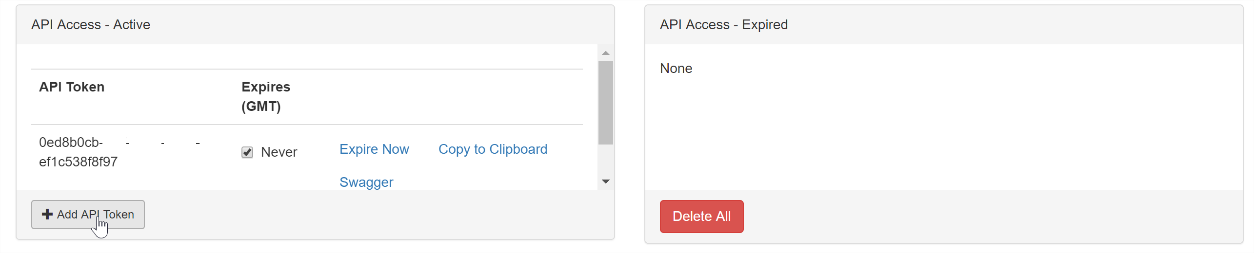
The Anonymous Token corresponds to an authentication access key, which can be obtained in the EMS. In order to generate your Anonymous Token, head over to API Access, register an application, select a role and channel and generate a token for it.

If you are unsure about how to get any of the information above, please contact the Appearition Support Team on your chosen EMS Portal. A fully setup profile might look like this:
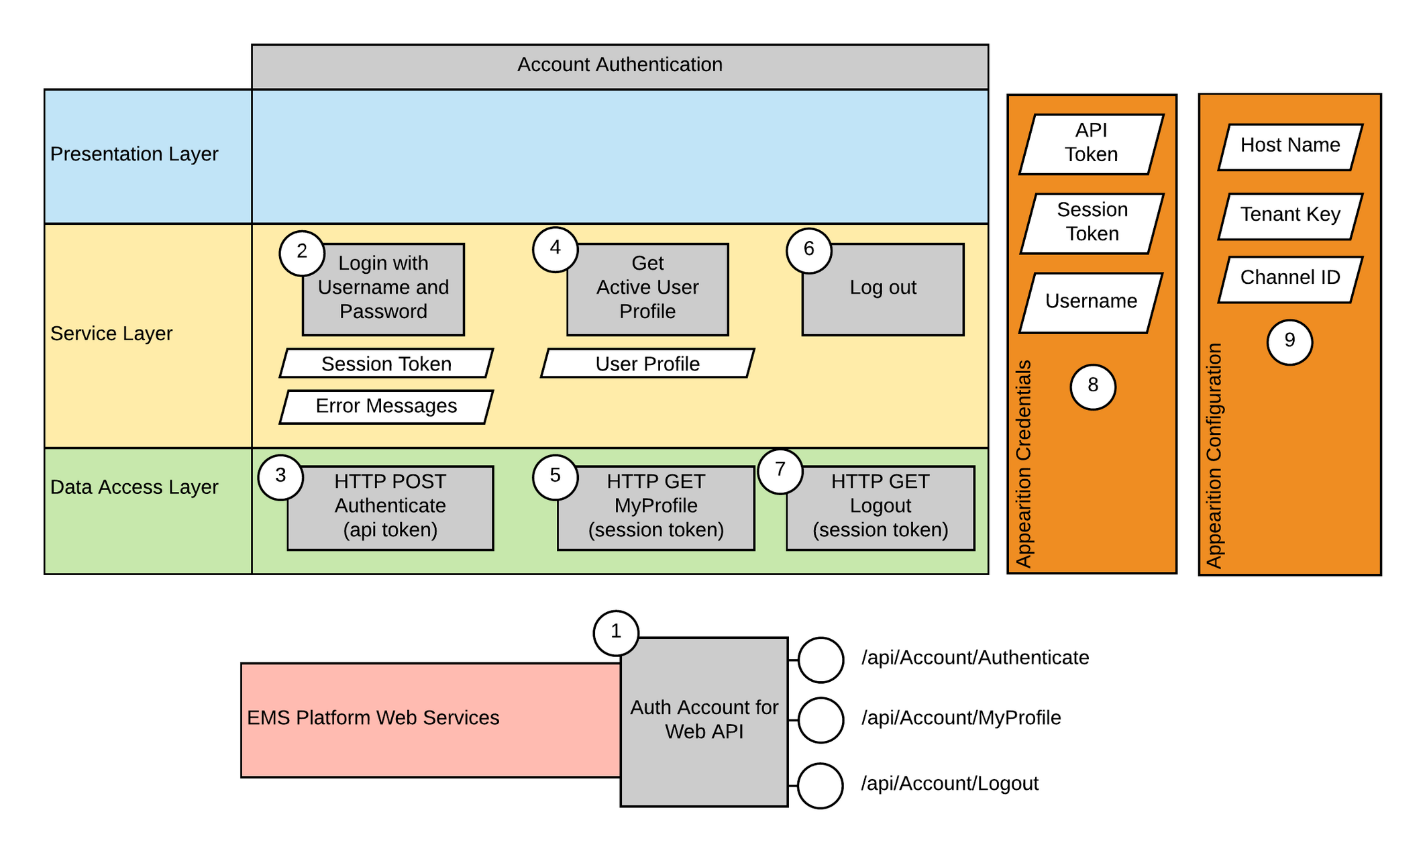
3.1 - Example of a login implementation using the Appearition SDK#
To begin with, it’s important to explain why and when it is required to login.
The Anonymous Token you entered in the Appearition Gate allows the user to access any feature which requires the lowest level of authentication (e.g. read a simplified format of a channel’s content). In order to modify the Channel’s content, a Session Token might be necessary.
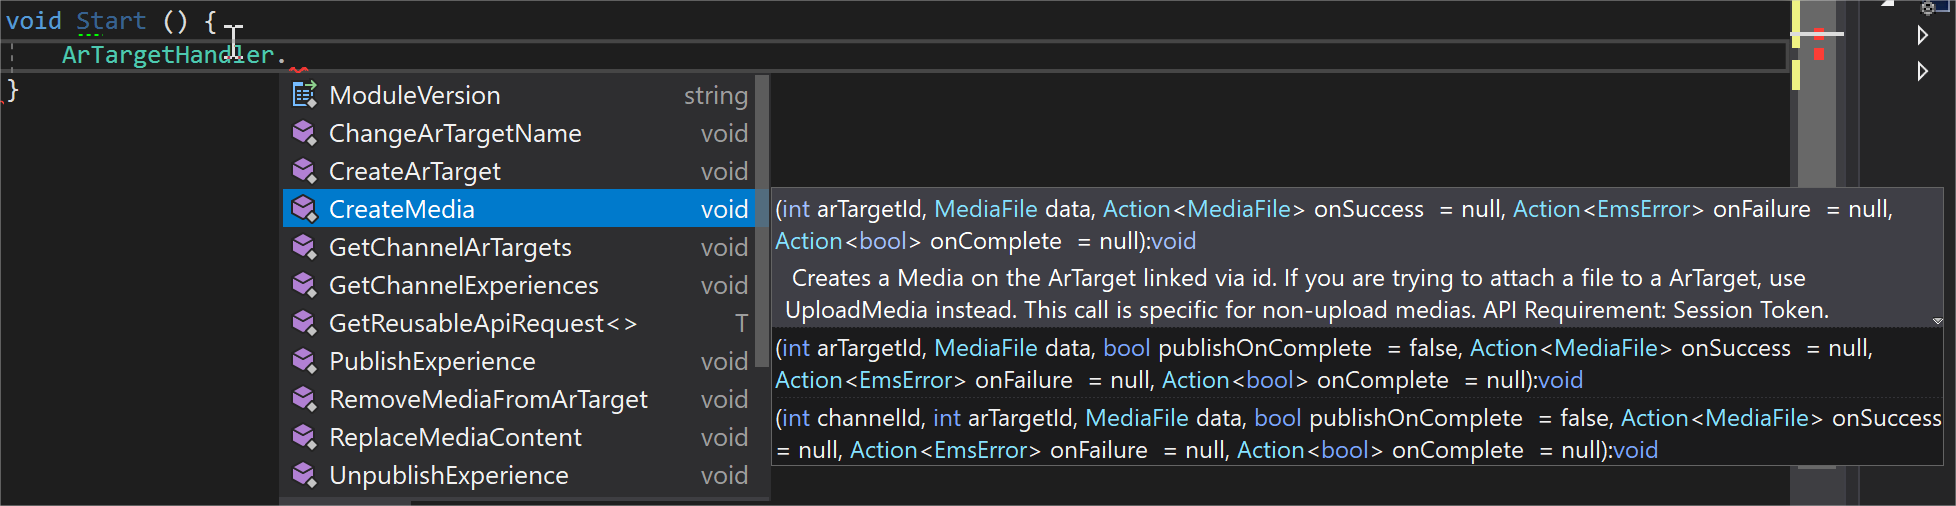
The required authentication level of each feature is included in the comments of each method in each handler, like so:
Once understood, here is how to simply Login and Logout.
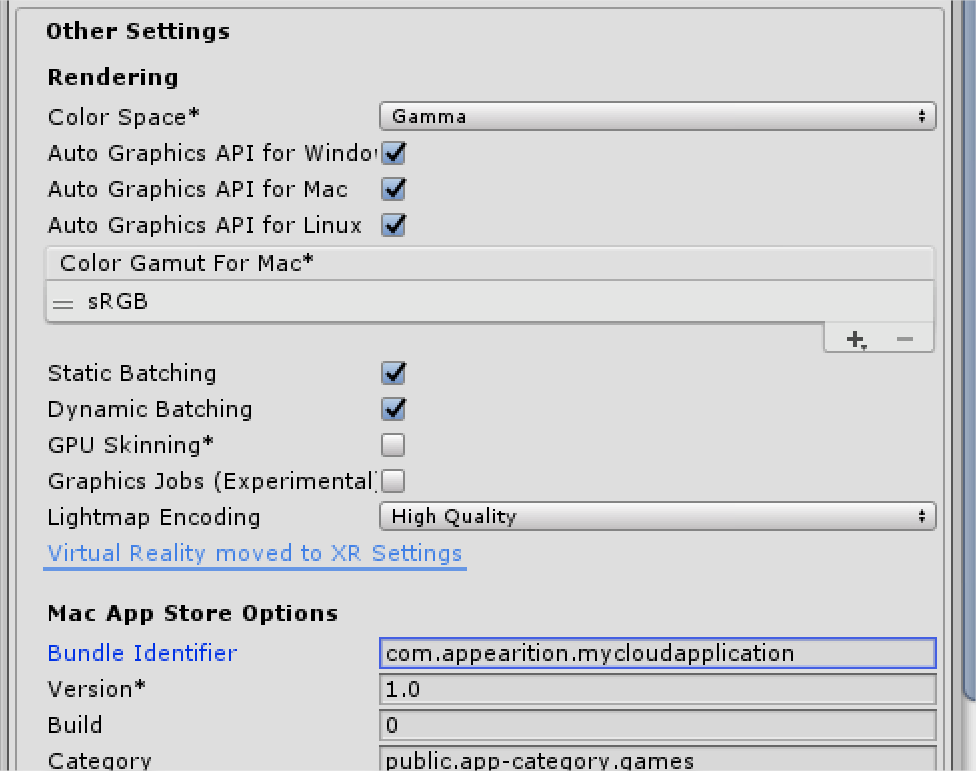
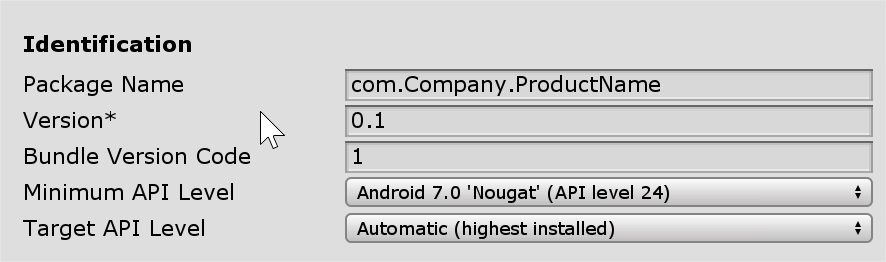
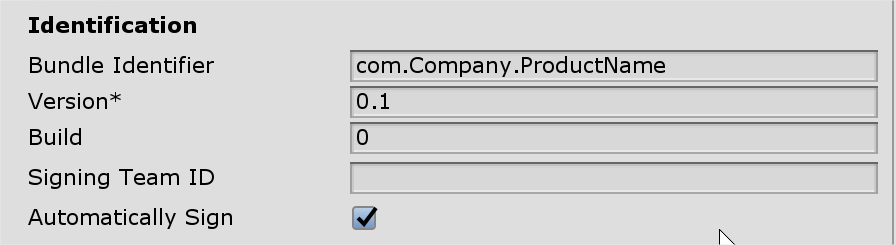
In order to do so, you will need to start with ensuring that the Application’s Bundle Identifier matches the one entered in the EMS Portal for the Anonymous Token you have entered. This information can be found under File > Build Settings > Player Settings > Other Settings > Bundle Identifier.
If you are working on a WebGL application, this field may not be accessible. If that’s the case, a field will appear in the AppearitionGate instead.
Once this step is complete, you can simply login using the AccountHandler.Login(username, password).

Do note that it is recommended but not mandatory to prompt your users to logout once their session is over.
3.2 - Method Callbacks#
Lastly, it is important to notice that each method in each handler contains several callbacks, each with their advantages and uses:
-
OnSuccess will only be called if the request has successfully ended. It may carry the information the user is trying to fetch as a parameter (e.g. a list of assets).
-
OnFailure is only called if the request has failed, due to any reasons. Its parameter contains information as for why it failed and possibly a message from the EMS when applicable.
-
OnComplete will be called either way, and contains a bool as a parameter to inform whether the request has successfully completed or not.
4.0 - Conclusion#
From here onwards, you should be able to explore the SDK’s Demo scenes content to have an overview of how to implement more complex features, as well as creating your own application!
If you have any question, please contact the Appearition Support Team.
Thank you and have a wonderful day!