API Access
Note
There is an assumption that you have already subscribed to an account on the Appearition Platform cloud. If you haven’t, please read Getting Started
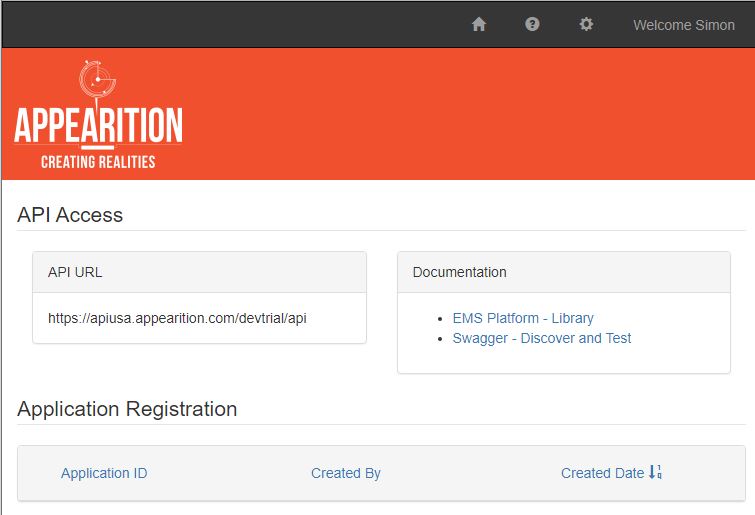
The Appearition platform exposes module functionality via RESTful API. You can view and manage access to the API for your account via the API Access menu in portal.
Swagger - Discover and Test#
As a developer, you can discover and test the available API endpoints using the Swagger interface via the Appearition Platform portal.
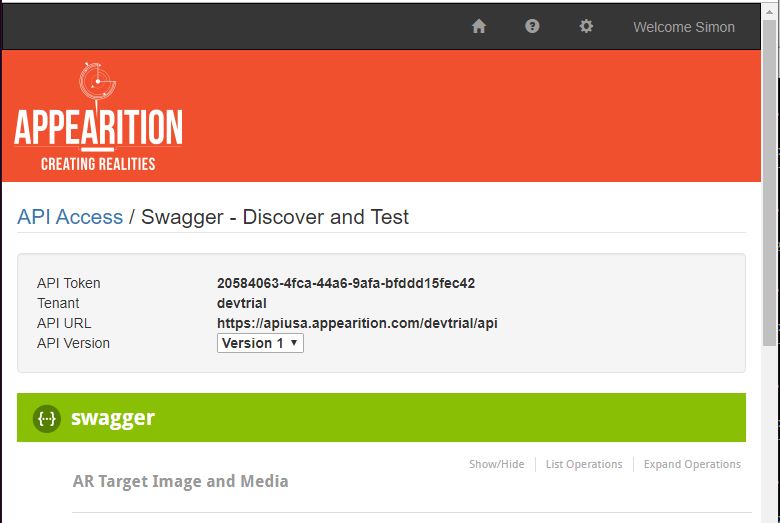
The Swagger tool is very useful for learning what end points are available and how to invoke them.
Discover the response schema of an endpoint
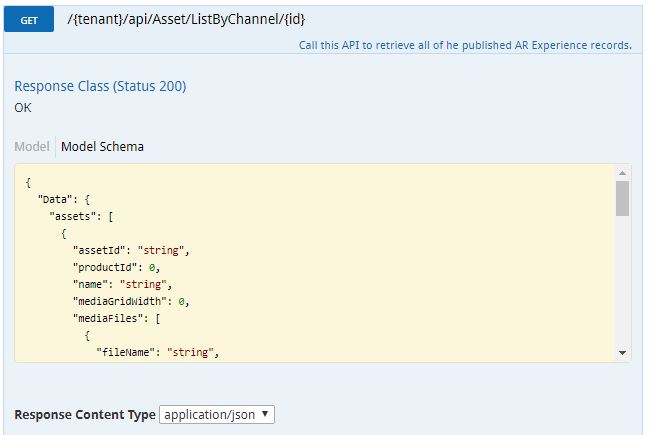
Discover what parameters are required to invoking an endpoint
Swagger also provides the ability to quickly and easily test an endpoint. This is very powerful when building an app that consumes the platform sevices. You can run the endpoint at any time in Swagger to verify how to invoke it and what data is returned.

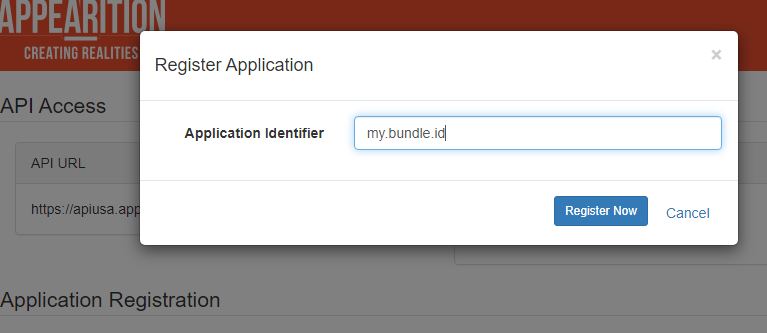
Application registration#
Before you can invoke any platform API endpoint, you will need to register your application first.
Registration can be made via the API Access screen in the portal. If you are building a device app, you can supply your apps bundle id. Alternatively, any unique string will suffice such as namespaces.
Configuring anonymous access permissions#
Once your application is registered, you will need to configure the anonymous access permissions for your account.
Anonymous access is a request made to an API endpoint without any identity information of the person using the app and making the request. As a developer, you must decide whether you want to allow anonymous access to the API endpoints, or if you want the user to first identify themselves (i.e. authenticate) before any requests.
After you have registered your application in the portal (see previous section), you are presented with a set of fields to configure the anonymous access permissions.
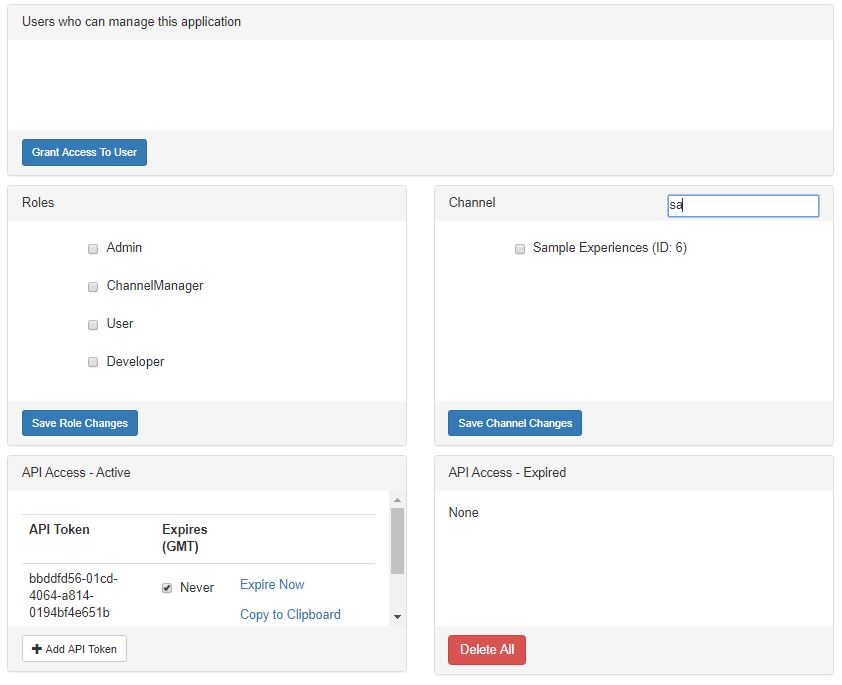
The configuration is organised into panels:
| Panel | Description |
|---|---|
| Users who can manage this application | You can use this panel to declare a specific user who can manage the access permission of the registered application. |
| Roles | You can decide what role is granted to anonymous requests. |
| Channel | You can decide which channel an anonymous request has access to. |
| API Access - Active | You will use this panel to create and expire anonymous access tokens. |
| API Access - Expired | You can view the anonymous tokens which have been expired. If you want you can restore an exprired token or permenantly delete it. |
User Authentication#
If you need your users to authenticate before making requests, the platform exposes a set of API endpoints that will manage this for you.
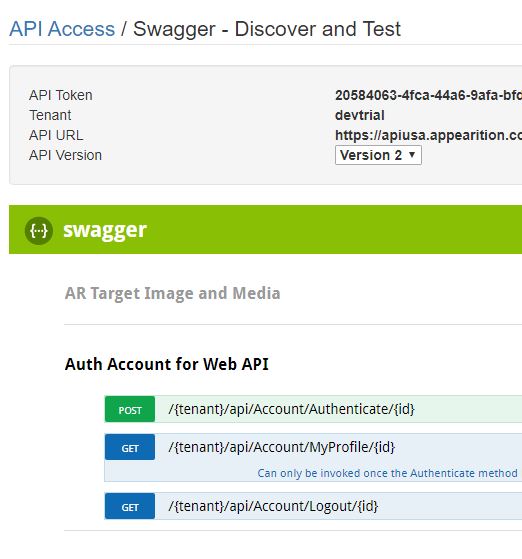
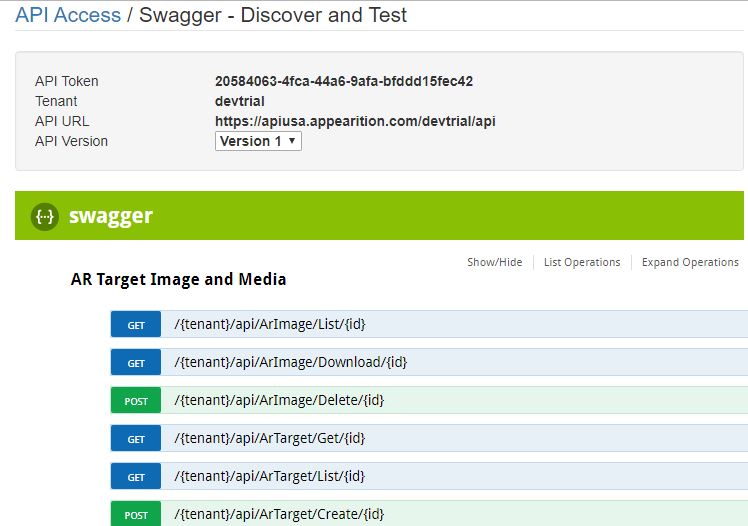
Via Swagger, under Version 2 of the API, you will find endpoints under the Auth Account for Web API module.
Authenticate endpoint#
Invoke this endpoint passing the username and password in the body. As part of the request, you need to supply the username and password of the user and the name of your registered application (i.e. appId).
{
  "username": "string",
  "password": "string",
  "appId": "string"
}
Note
If authentication fails, you will still receive a HTTP 200 OK response status back from the request. Review the response body for error details.
If authentication passes, the response will contain a Session Token. You will need to store this in you app code and use it to make the requests to other API endpoints on the platform.
Session tokens have a 60 minute expiration timeout with the option to make it slide. Refer to Auth Account and Registration module settings
MyProfile endpoint#
Once authenticated, to view the identity information of the user you can call the MyProfile endpoint.
You will need to supply the session token in the request.
Logout endpoint#
Once your user session is complete, you can invoke the Logout endpoint. This will expire the users session token immediately and no further requests will be accepted that that token.
Using tokens when invoking an API endpoint.#
Whether anonymous or authenticated, all requests to API endpoints require a token to be sent as part of the request header variables.
| Header Variable | Value |
|---|---|
| authentication-token | String |
Example:
curl -X GET --header 'Authentication-Token: 20584063-4fca-44a6-9afa-bfddd15fec42'
            --header 'Accept: application/json'
            --header 'API-Version: 1'
            'https://apiusa.appearition.com/devtrial/api/Asset/ListByChannel/0'
API Versioning#
To maintain integrity of applications on the platform as upgrades and improvements are made over time, the API endpoints have a versioning system. You can identity which endpoints are supported in the version via Swagger. You need to supply the correct endpoint version number in the request header variables
| Header Variable | Value |
|---|---|
| API-Version | Number |
Example:
curl -X GET --header 'API-Version: 1'
            --header 'Authentication-Token: 20584063-4fca-44a6-9afa-bfddd15fec42'
            --header 'Accept: application/json'
            'https://apiusa.appearition.com/devtrial/api/Asset/ListByChannel/0'
Note
By default (and for backward compatibility), if you do not supply the header variable, then the platform will assume version 1.
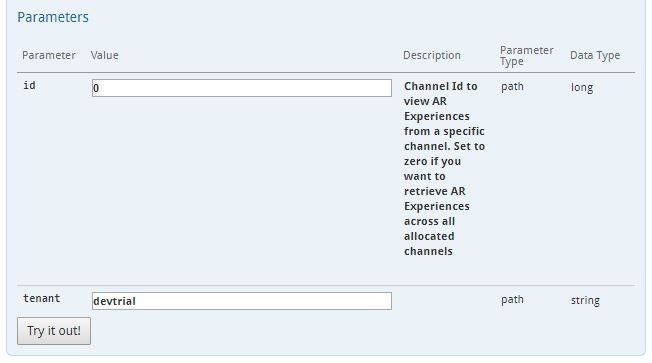
Tenant Key#
It is important to highlight that the Appearition platform is multi-tenanted (click here for more information).
This implies that the URI for the API endpoints requires the tenant key to be present. This tenant key is the first part of the URI after the domain name.
For instance
https://apiusa.appearition.com/devtrial/api/Asset/ListByChannel/0
In this case, devtrial represents the tenant key.
This is important because depending on your level of subscription you may have access to one or more tenants. When building an app or solution that consumes the Appearition Platform API, you need to know for which tenant you are making the request and provide the appropriate tenant key in the URI path of the request.
The HTTP 200 OK Response Schema#
All HTTP GET and POST requests will return a HTTP 200 OK status along with a JSON formatted body. The response will declare if the request was successful and either return a data model or a list of error messages.
{
  "Data": { ... },
  "IsSuccess": true | false,
  "Errors": ["string"]
}
| Response Fields | |
|---|---|
| Data | Will contain the populated response schema. |
| Errors | Is a collection of messages if any validation problems occurred with the request. |
| IsSuccess | Indicates if the request succeeded or failed. If *false* look for one or many messages in the *Errors* collection |
Note
Any unhandled exceptions or catastrophic events on the server will yield a HTTP 500 response without any further details.
Date and Time Formatting#
All dates should be sent and received in UTC as JSON standard format:
yyyy-MM-ddTHH:mm:ssZ
Example:
2014-12-18T02:37:08Z
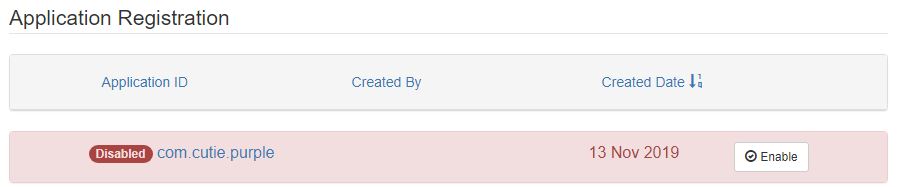
Disabling a registered application#
At anytime, you can block all access to your account from your app by disabling the registered application in the portal.
On the API Access screen, you will find a button next to your registered applications labelled “Disable”.
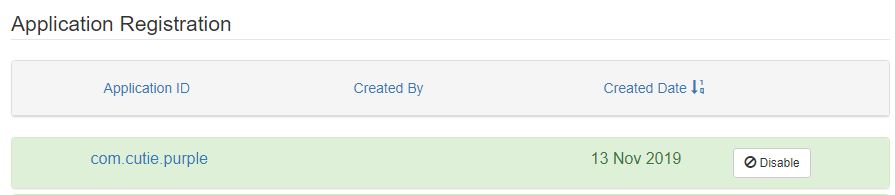
Clicking the “Disable” button will immediately block all API requests from your app. You can always re-enable by simple clicking the “Enable” button of a disabled application.